
Packaging multiple Salesforce files into a single archive should not require downloading each file manually, compressing them outside the platform, and re-uploading the result. The Zip feature in Dumping Cloud — Salesforce File Manager brings the entire workflow inside Salesforce — select your files, name your zip, choose whether to save it to your desktop or keep it on the record, and optionally clean up the originals in the same step.
Whether you are packaging a deal file set for client handoff, archiving a resolved Case before closure, or compressing a contract package for regulatory submission, the Zip feature gives you a fast, clean, and complete file packaging workflow — without leaving your browser.
The Problem: Sharing or Archiving Multiple Salesforce Files Is Messier Than It Should Be
You need to send fifteen files from a Salesforce record to a client. Or archive a complete set of Case attachments before closing the record. Or package every document from a finished Opportunity before handing it off to the delivery team.
Whatever the scenario, the result is the same — too many individual files, and no native way to package them cleanly.
Salesforce does not have a built-in zip capability. The standard workflow is painfully familiar:
- open the record,
- download each file one at a time,
- locate them all in your Downloads folder,
- manually select them,
- right-click and compress,
- rename the zip,
- and then either re-upload it to Salesforce or share it externally.
For ten, fifteen, or twenty files, this takes far longer than it should — and every step is a manual one.
Dumping Cloud — Salesforce File Manager removes every one of those steps. The Zip feature lets you select any number of files of any type from a Salesforce record, compress them into a single zip package, name it, and save it — either directly to your desktop or back onto the same Salesforce record — all from within the extension panel. And if the originals are no longer needed after zipping, you can delete them in the same operation.
What the Zip Files Feature Does
The Zip feature in Dumping Cloud — Salesforce File Manager allows you to:
- Select any number of files from a Salesforce record and compress them into a single zip file in one operation
- Zip any file type — PDFs, Word documents, images, spreadsheets, presentations, and any other file stored in Salesforce Files
- Name the zip file — use the auto-generated default name or define a custom name before saving
- Choose where to save the zip — download it directly to your desktop, or save it back as a new file on the same Salesforce record
- Optionally delete the original files after the zip is saved — freeing up Salesforce file storage and keeping the record clean in one step
- Perform the entire operation within the extension panel — no third-party compression tool, no manual file selection outside Salesforce
Who Benefits Most
The Zip feature is valuable across a wide range of roles and everyday Salesforce workflows:
- Salesforce Admins — Compressing and archiving complete file sets from records before deletion, migration, or Org restructuring — and clearing the originals from storage in the same step to reclaim space
- Sales teams — Packaging an entire deal file set (proposal, pricing, case study, contract) from an Opportunity into a single zip for clean client handoff or internal archiving after deal closure
- Customer support teams — Zipping all attachments from a resolved Case into one archive file before closing the record, keeping Case history clean while preserving all documentation
- Legal and contracts teams — Compressing a full contract package (agreement, schedules, exhibits, correspondence) into a single zip for external sharing, legal archiving, or regulatory submission
- Finance and procurement — Packaging all financial documents, invoices, and approval records from an Account or Contract into one zip for period-end audit submission
- HR and people operations — Archiving all employee-related files from a Contact record into a zip at the end of an engagement, offboarding process, or compliance review
Guide to Zip Files Using Dumping Cloud — Salesforce File Manager
Prerequisites
Before you begin, ensure the following:
- Google Chrome is installed on your desktop
- DumpingCloud is installed from the Chrome Web Store (Install here)
- You are logged into your Salesforce Org in the same Chrome browser
- You have the necessary Salesforce permissions to view and edit files on the target record
01
Step 1
Navigate to the Record and Open the Extension
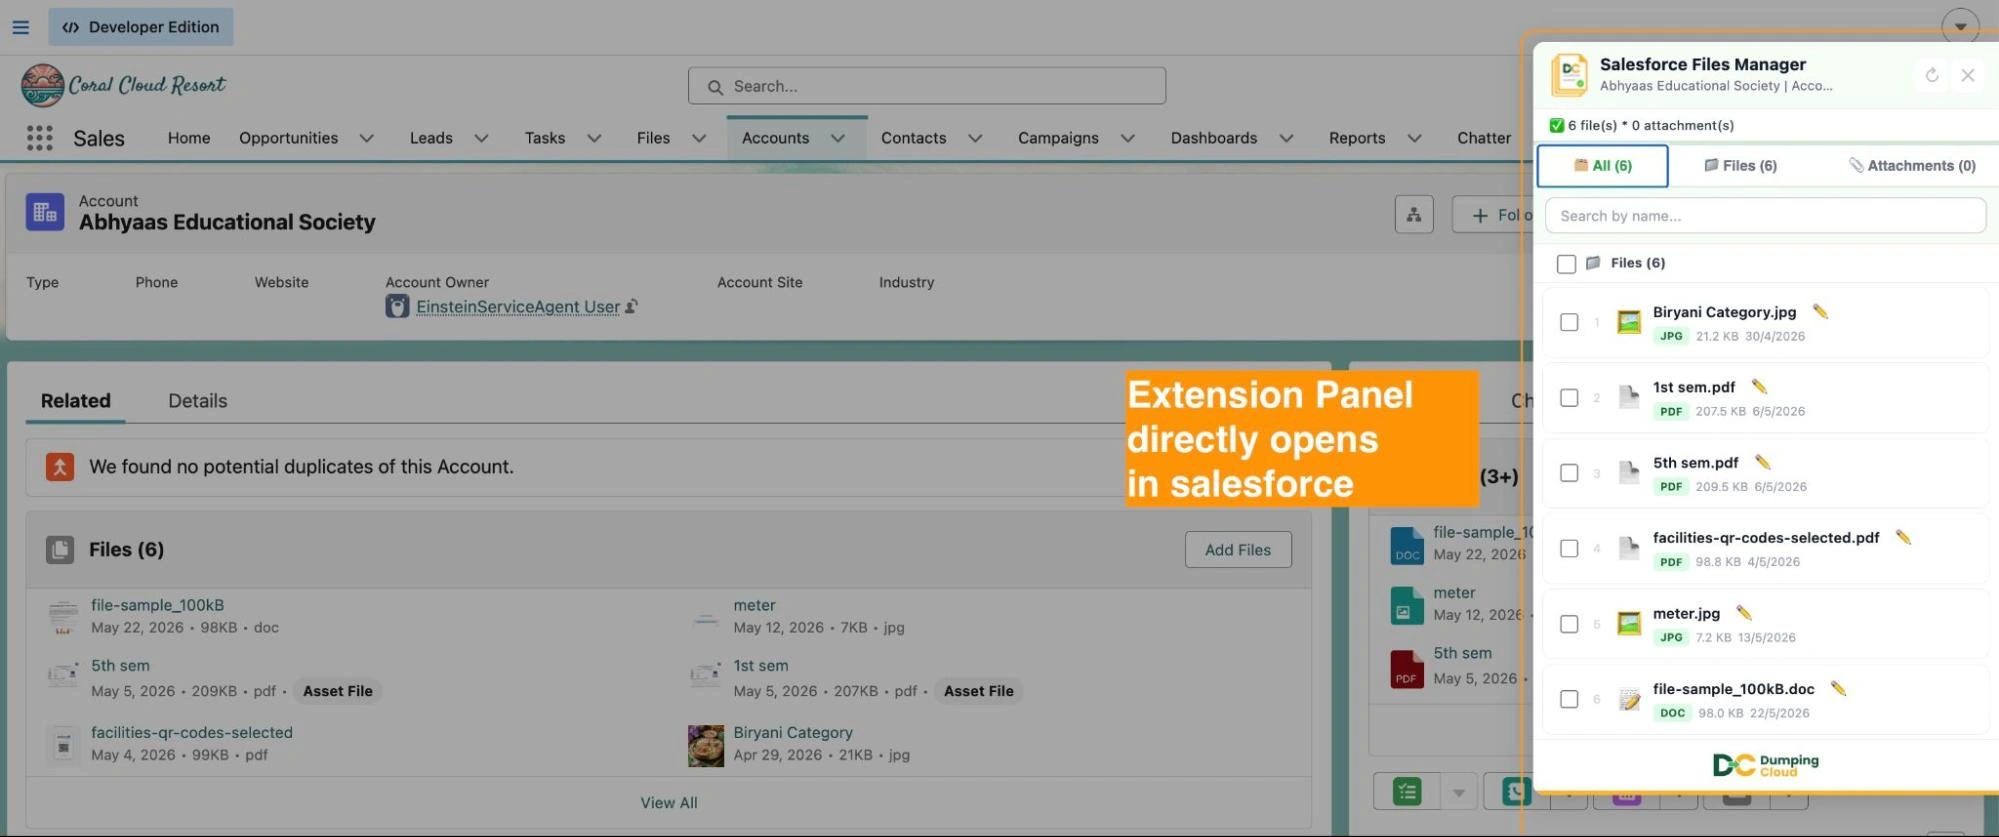
Open Google Chrome and log in to your Salesforce Org. Navigate to the record containing the files you want to zip.
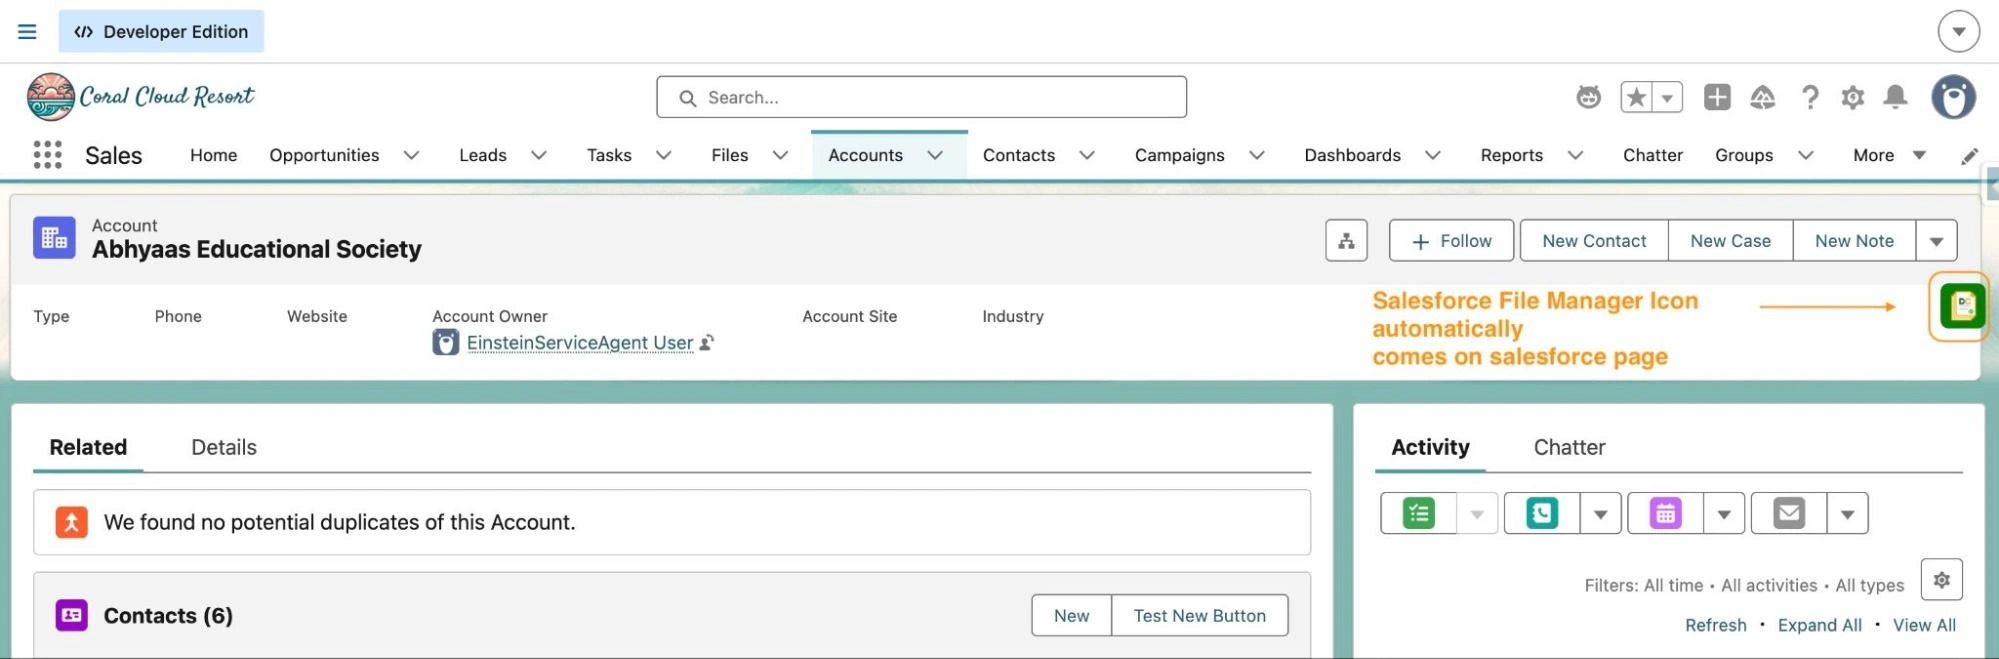
The extension panel will open and automatically load all files and attachments associated with the current record.
02
Step 2
Select the Files to Zip
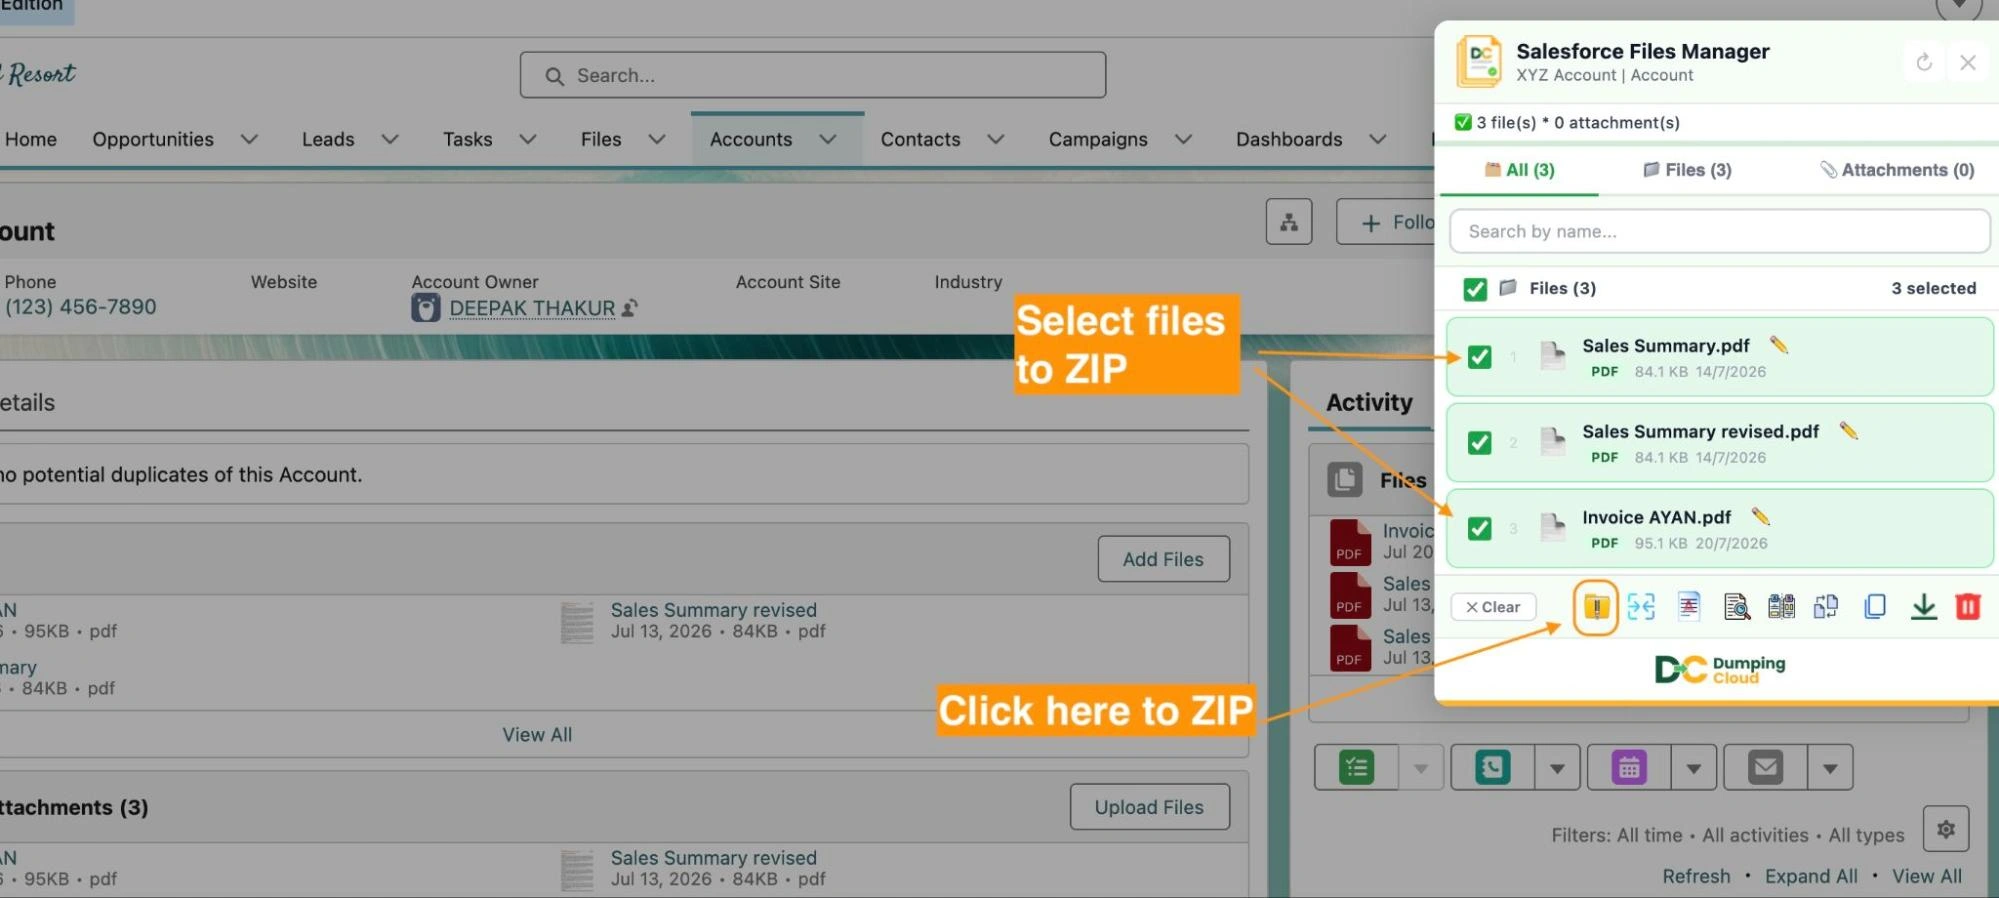
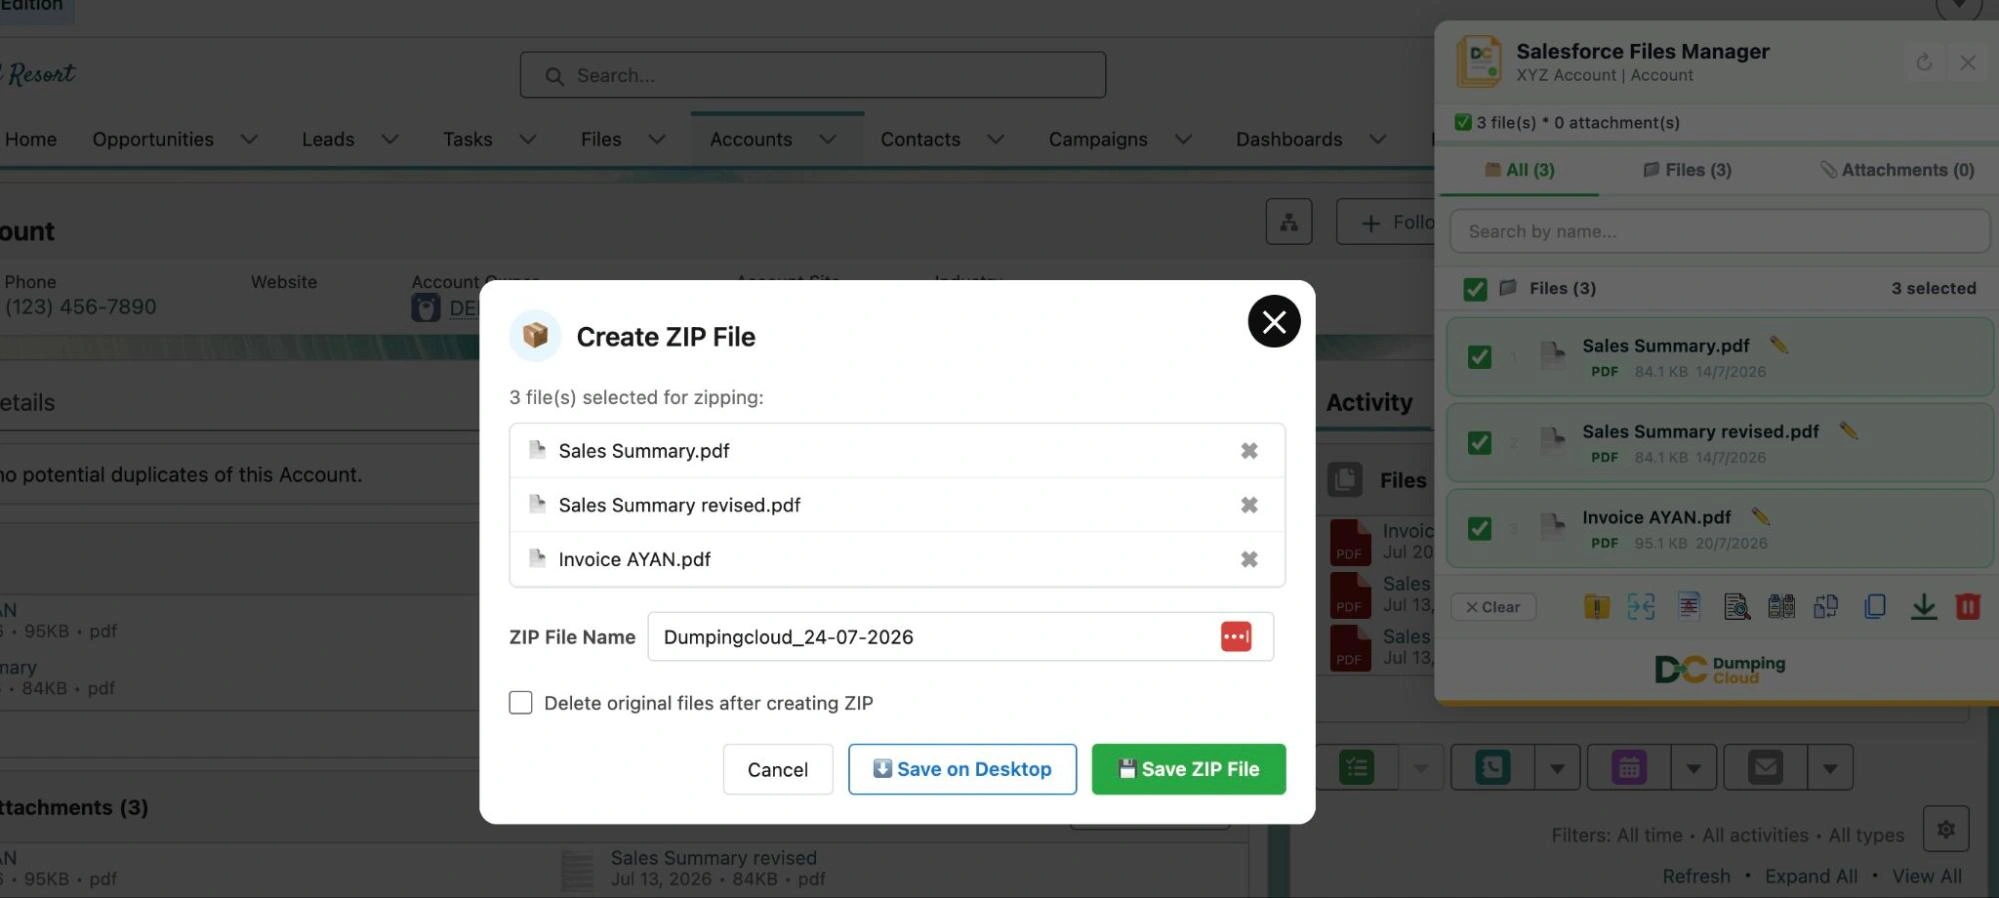
To zip specific files: Click the checkboxes next to each file you want to include in the zip. To zip all files on the record: Click the “Select All” checkbox to select every file in one action.
Click the “Zip” Button
With your files selected, click the “Zip” button in the extension panel action bar. The Zip configuration panel will open.
03
Step 3
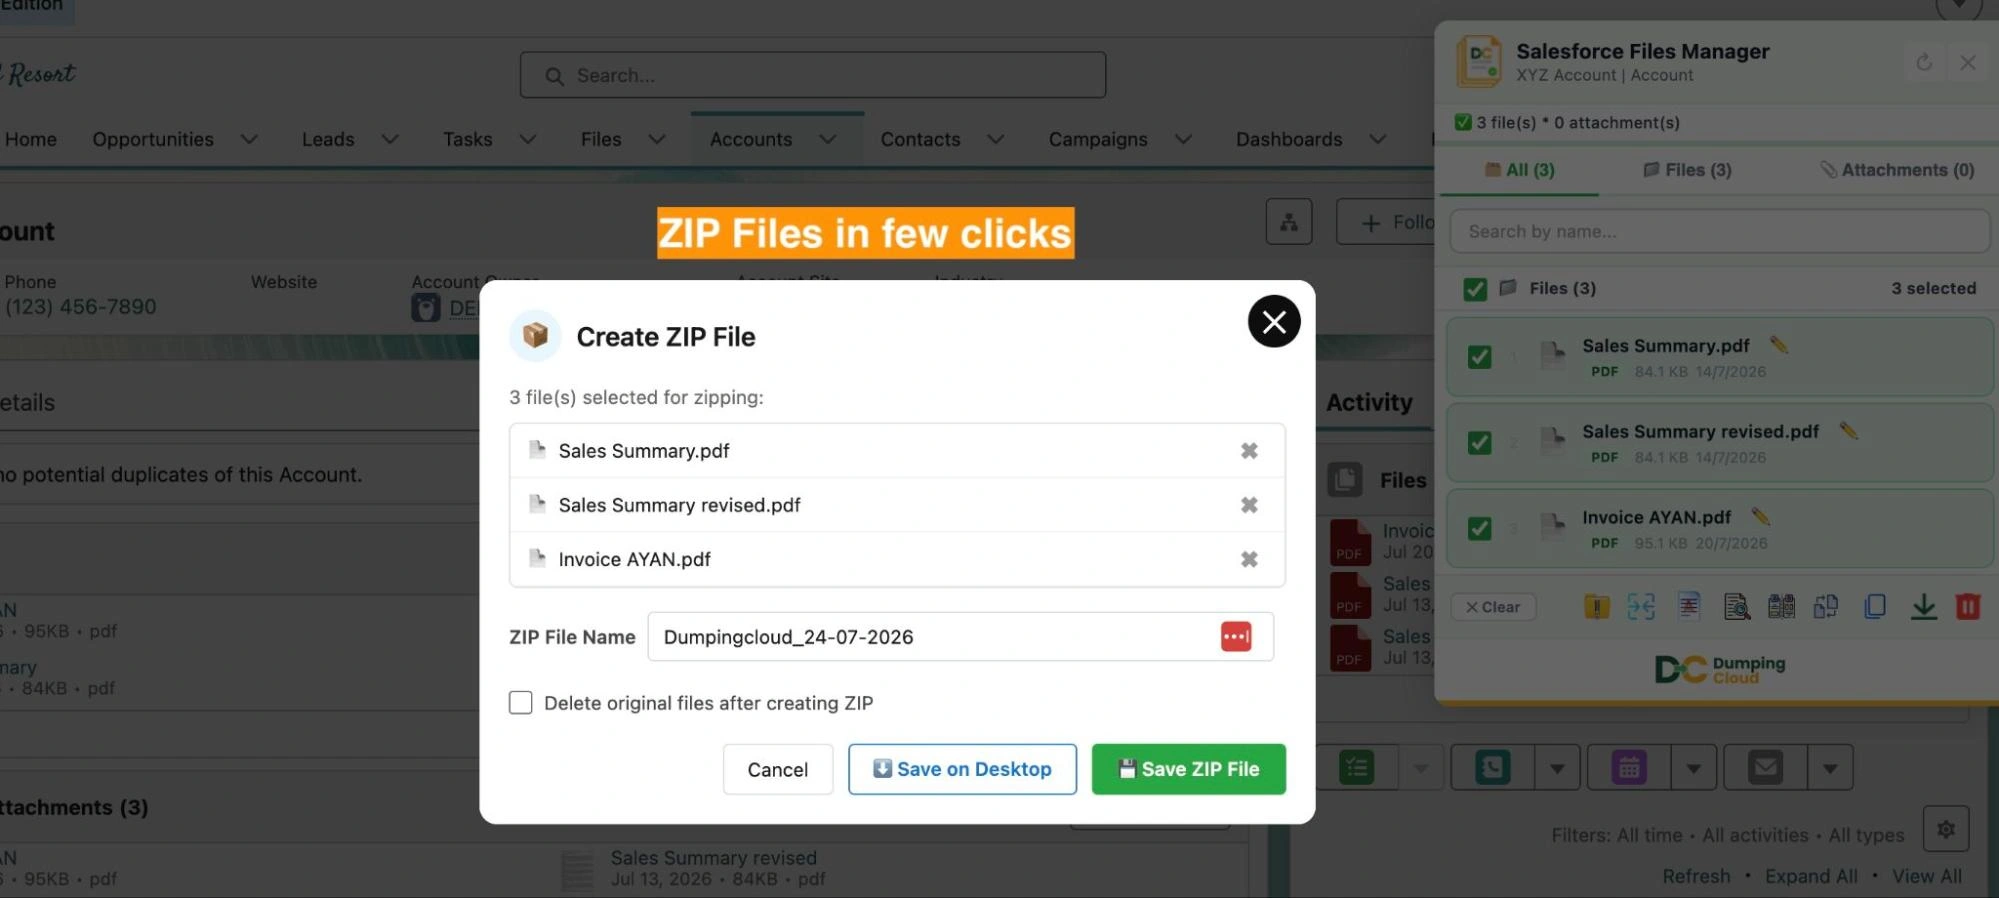
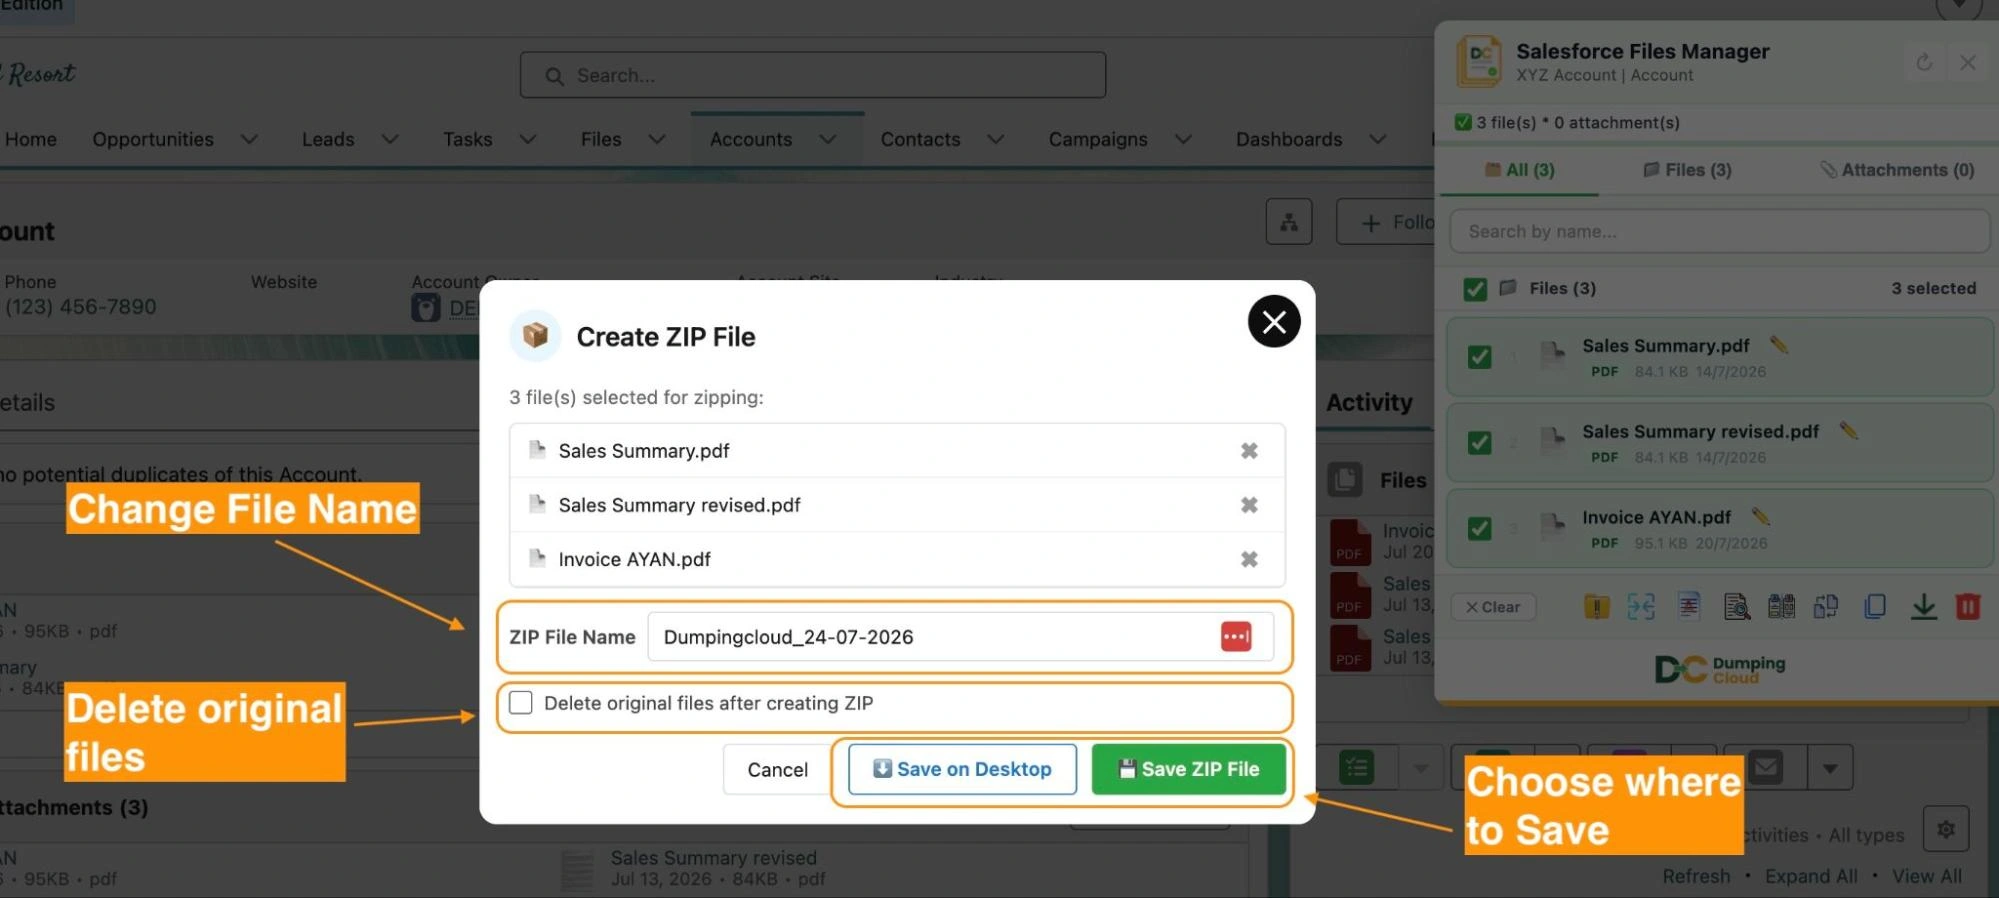
Perform the below configurations:
(i). Name the Zip File
In the Zip configuration panel, review the auto-generated file name. If you want to use a custom name, clear the field and type your preferred name for the zip file (e.g., “OpportunityFiles_AcmeCorp_2026.zip”).
(ii). Choose whether to Delete the Original Files
Below the save options, you will see an optional checkbox: “Delete original files after saving the zip”.
- Leave unchecked — All original files remain on the Salesforce record after the zip is saved
- Check this option — The original files included in the zip will be permanently deleted from the Salesforce record once the zip has been saved successfully.
04
Step 4
Choose the save button as per your preferred location
Select your preferred save destination:
- Save to Desktop — The zip file will be downloaded directly to your browser’s default download location on your local machine
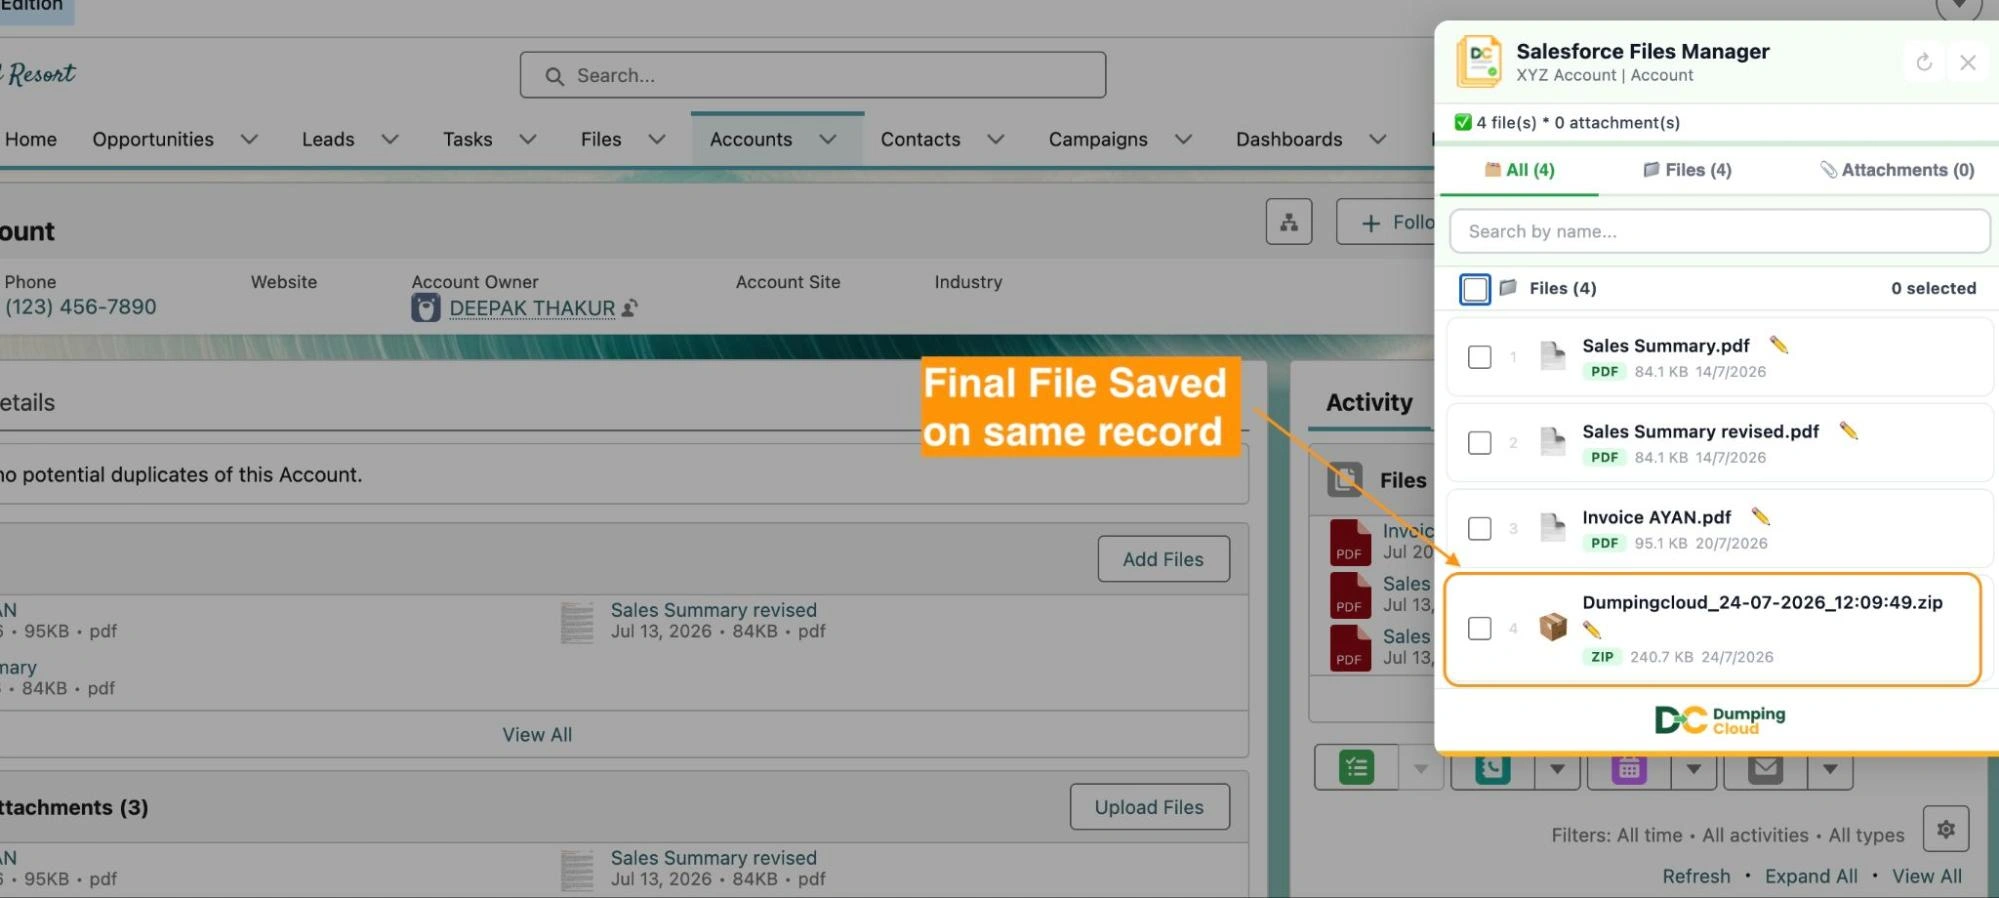
- Save to Salesforce — The zip file will be saved as a new file on the same Salesforce record, visible in the Files related list
Once you are satisfied with the file name and delete preference, click the required save button to execute the operation.
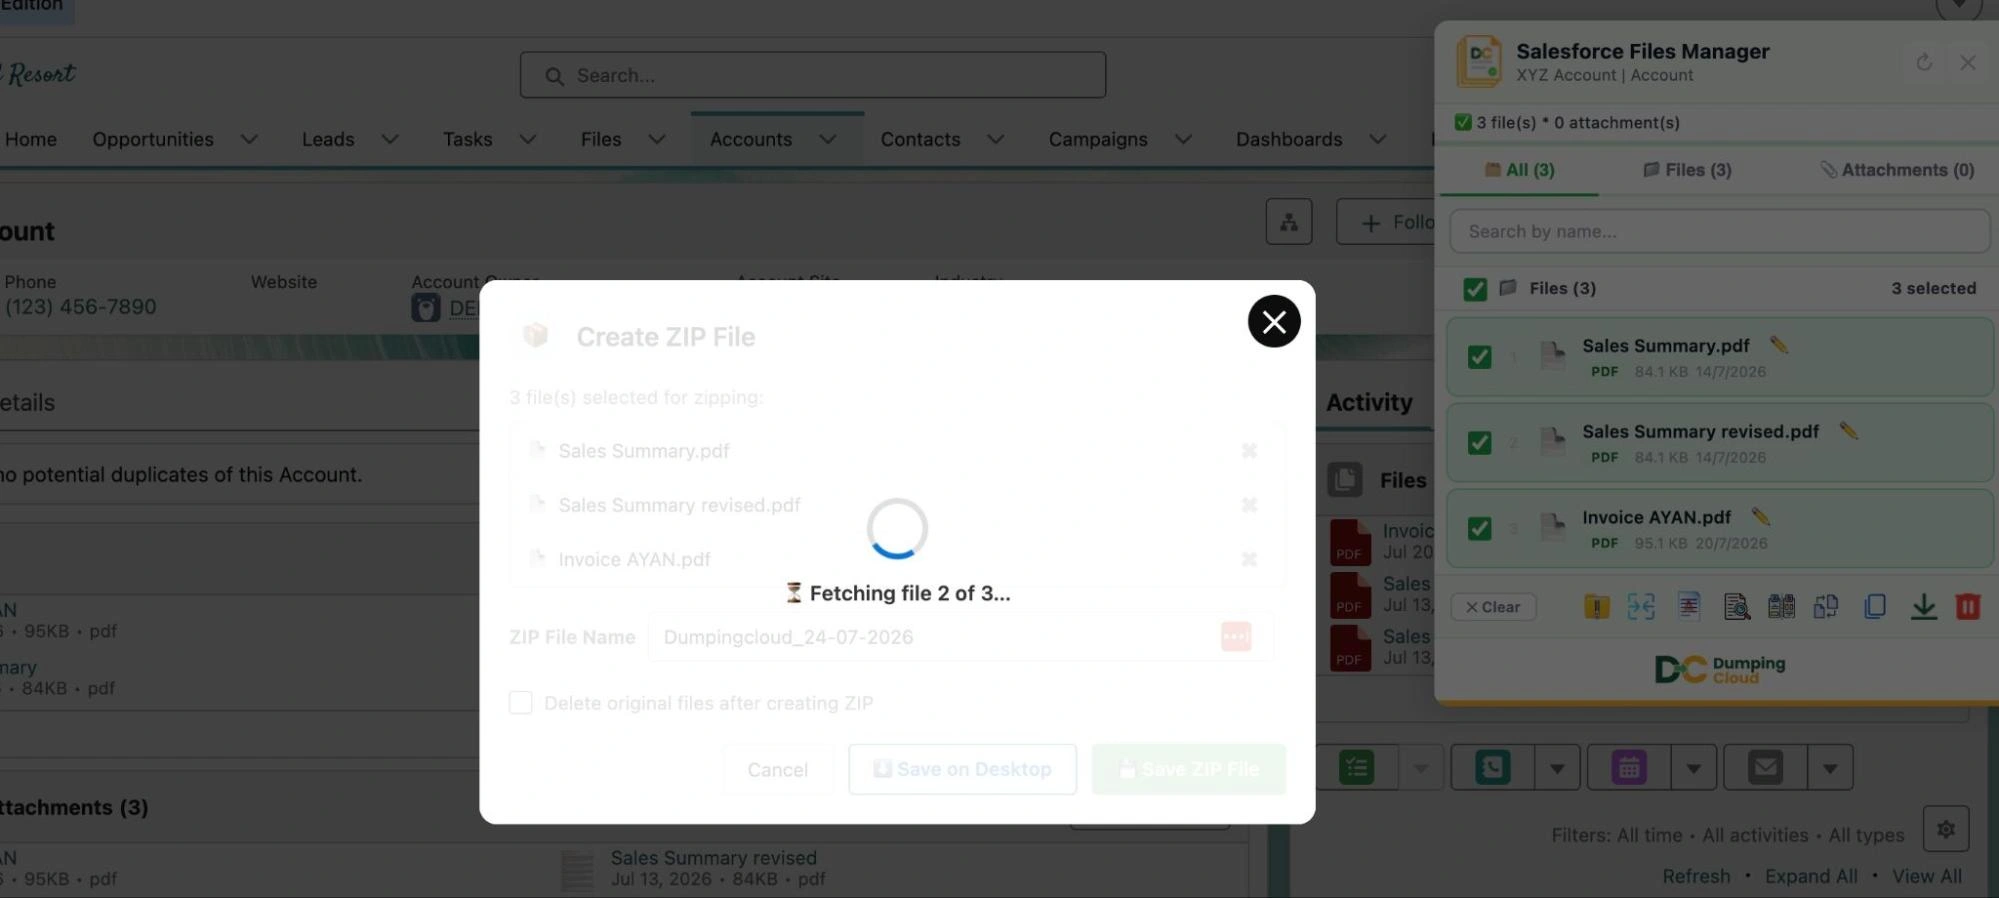
The extension will compress all selected files into a single zip package and save it according to your chosen destination. If you selected “Delete original files”, the originals will be removed from the record once the zip is confirmed as saved.
A progress indicator will display during compression, particularly for larger file sets.
05
Step 5
Confirm and Verify
A success confirmation will display once the zip is complete, showing the zip file name, size, and save destination.
- If saved to desktop — Locate the zip file in your browser’s Downloads folder or the default download location on your machine
- If saved to the Salesforce record — Navigate to the Files related list on the record to confirm the zip file is present and correctly named
- If originals were deleted — Confirm the original files no longer appear in the Files related list on the record
Key Advantages Over the Manual Approach
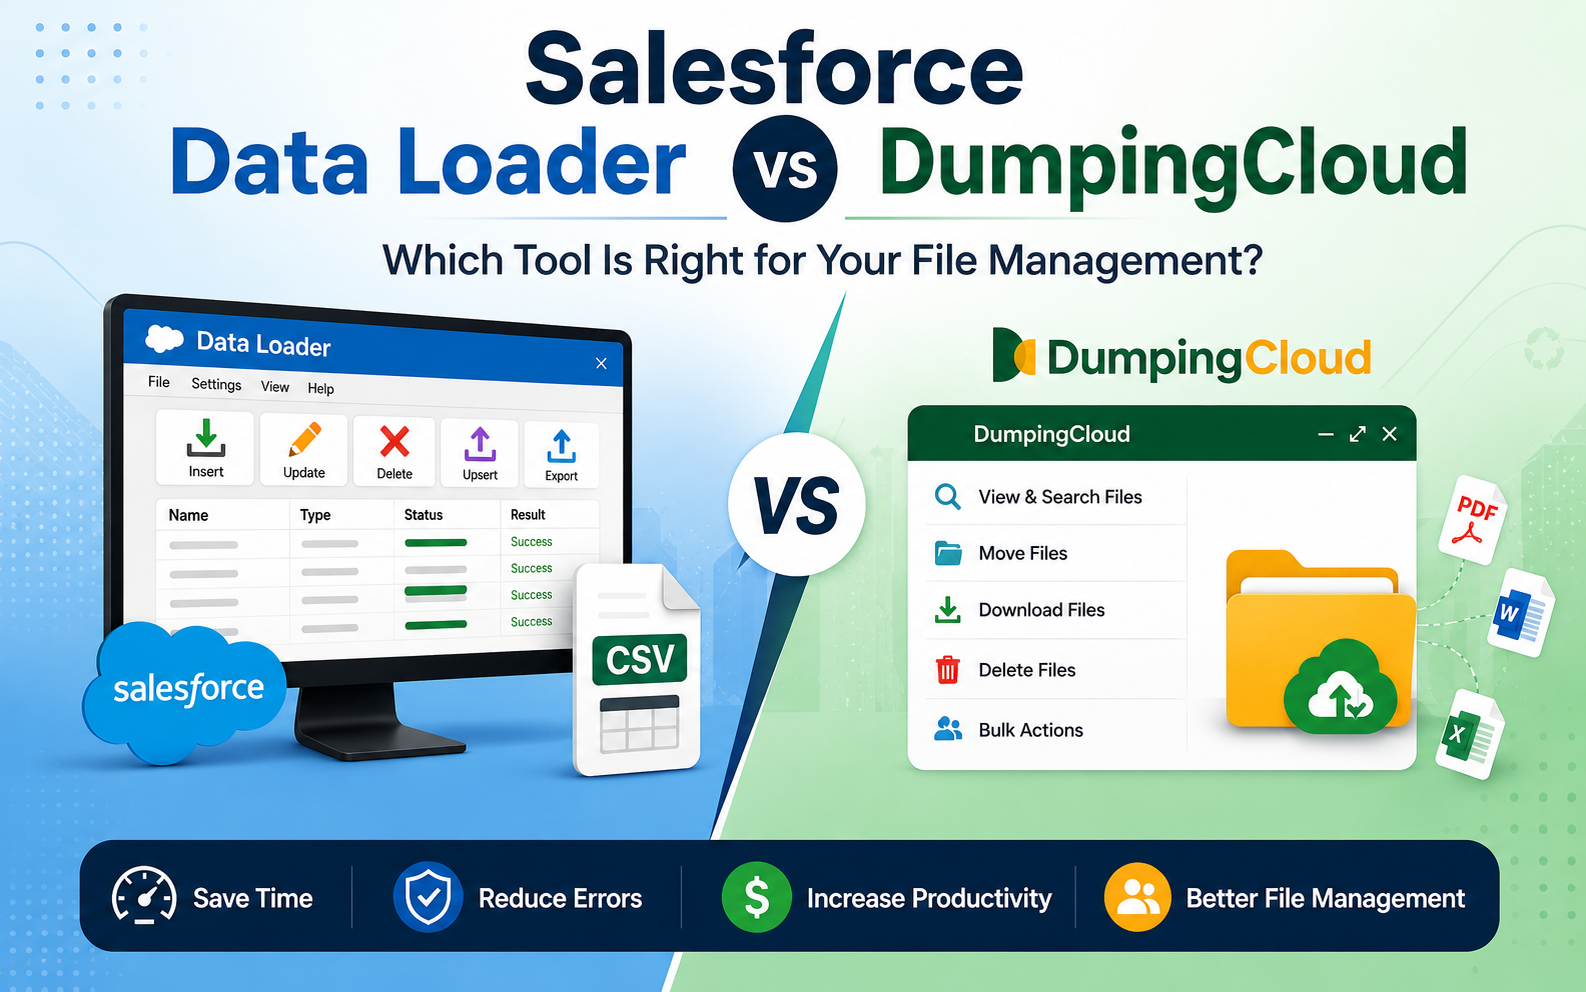
| Capability | Manual Download & Compress | DumpingCloud |
|---|---|---|
| Zip multiple files at once | ✅ Via OS right-click compress | ✅ Directly in the extension |
| Zip any file type | ✅ Yes | ✅ Yes |
| Save zip back to Salesforce record | ❌ Manual re-upload required | ✅ Built-in save-to-record option |
| Delete originals after zipping | ❌ Separate manual step | ✅ Optional in-operation delete |
| Requires leaving Salesforce | ✅ Yes — download required for files | ❌ No download required. The entire process is happening in-browser. |
| Custom zip file naming | ✅ Via rename after compression | ✅ Named before saving |
| Time for 10+ files | 5–10 minutes | Under 1 minute |
Install DumpingCloud – Salesforce Files Manager
👉 Try DumpingCloud — on your favorite browser

Frequently Asked Questions
Is there a limit to how many files I can zip at once?
The Zip feature supports selecting all files on a record in a single operation. For records with very large numbers of files or very large individual file sizes, processing time may be longer, but there is no fixed limit on the number of files that can be included.
If I choose to delete the original files after zipping, can I recover them?
Deleted files are moved to the Salesforce Recycle Bin and can be restored within 15 days, provided the Recycle Bin has not been emptied. After 15 days, or if the Recycle Bin is manually emptied, the files are permanently removed. It is recommended to verify the zip file is complete and accessible before choosing to delete the originals.
Can I save the zip to both my desktop and the Salesforce record at the same time?
The current save options allow you to select one destination per operation — either desktop or the Salesforce record. To save to both, perform the zip operation twice with different save destinations selected each time.
Will the zip file be visible to other Salesforce users if saved to the record?
Yes. When saved to the Salesforce record, the zip file appears in the Files related list and is accessible to any user with the appropriate permissions to view files on that record.
Can I open and preview the zip file from within Salesforce?
Zip files are not natively previewable within Salesforce. If saved to the record, the zip can be downloaded from the Files related list and extracted on any local machine using standard operating system tools.
Does zipping files affect the original files in any way if I do not choose to delete them?
No. If you do not select the "Delete original files" option, the zip operation is entirely non-destructive. All original files remain on the Salesforce record exactly as they were before the operation.
Do I need System Administrator permissions to use the Zip feature?
You need sufficient Salesforce permissions to view the files on the record. To save the zip back to the Salesforce record, you also need file creation permissions on that record. To delete the original files, you need file deletion permissions. The extension respects your existing Salesforce profile and sharing rules throughout.
Ready to manage Salesforce Files faster?
Download, move, rename, merge, split, convert, compare, and manage your Salesforce Files — without leaving Salesforce.