
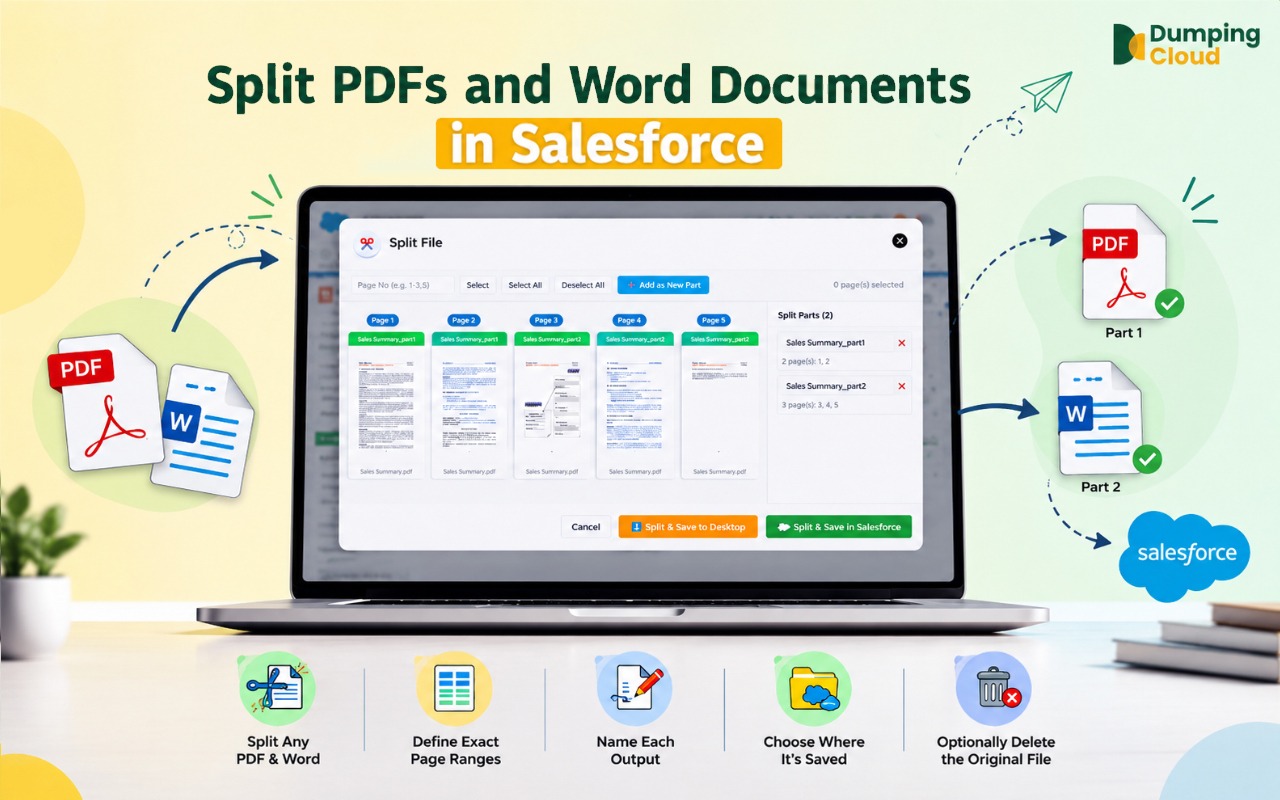
Large documents stored in Salesforce almost always contain more than any one person or team needs to see. But without a native way to break them apart, the whole file gets shared, downloaded, and passed around — creating security risks, version confusion, and unnecessary friction.
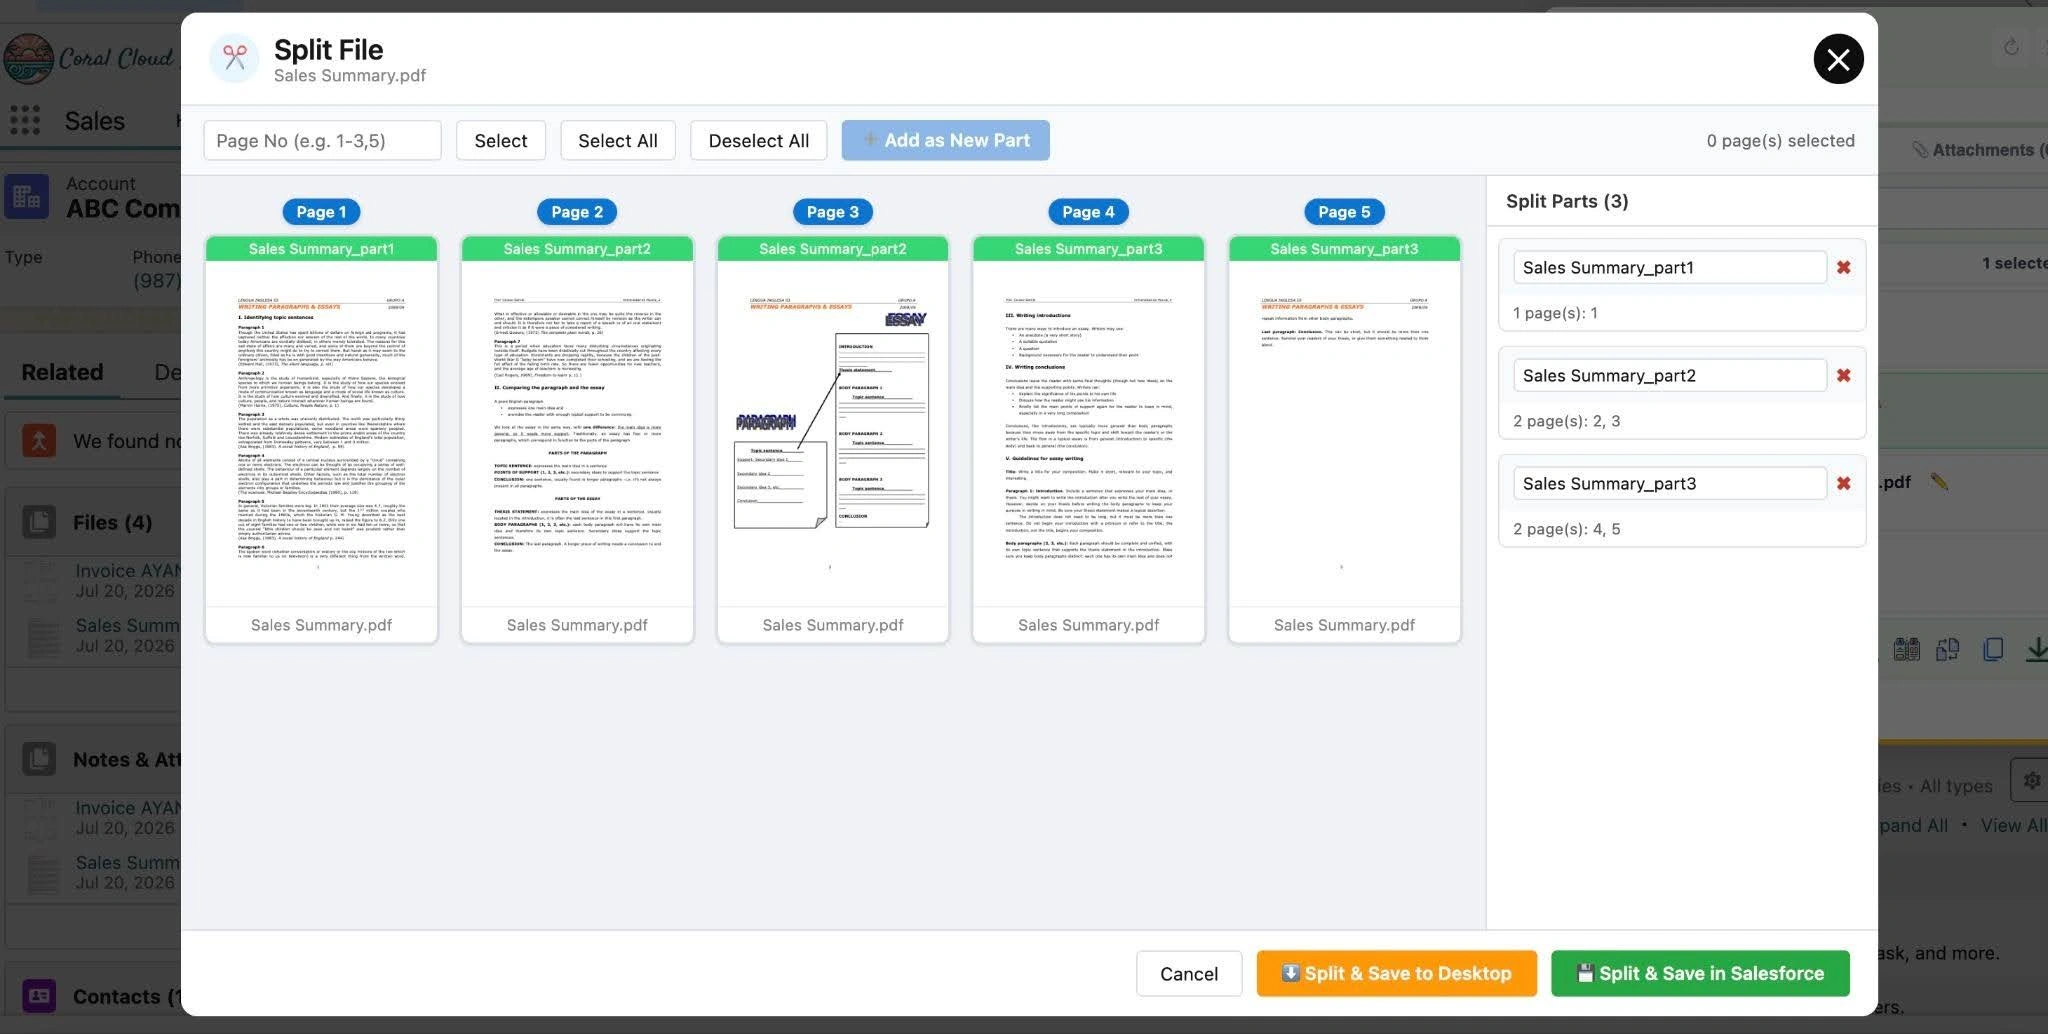
The Split feature in Dumping Cloud — Salesforce File Manager gives you precise, page-level control over how any PDF or Word document is divided — define your ranges using print-style notation, name each output file, choose where it is saved, and optionally clean up the original — all in one operation, all inside Salesforce, in under two minutes.
Whether you are extracting a signature page from a 40-page contract, breaking a diagnostic report into individual issue summaries, or decomposing a financial statement into period-by-period documents, the Split feature delivers exactly what you need — nothing more, nothing less.
Quick Answer
If you need to split PDF files in Salesforce, you don’t have to download the document, cut it up in a desktop PDF editor, and re-upload the pieces. DumpingCloud — Salesforce File Manager includes a built-in Salesforce PDF splitter that works directly inside your Org: define page ranges, name each output file, and save the split PDFs back to the record in a single operation.
The Problem: One Large File on a Salesforce Record, Multiple Teams Need Different Parts of It
A 40-page contract is stored on a Contract record in Salesforce. Different teams need different set of pages:
- Legal needs pages 1 to 5 — the core agreement.
- Finance needs pages 6 to 12 — the payment terms.
- Operations needs pages 13 to 20 — the delivery schedule.
- And the client needs a clean copy of pages 38 to 40 — the signature pages only.
Currently, Salesforce has no way to help you with any of that.
The only path forward is to download the file, open it in a PDF editor or Word processor, manually extract the required pages, save each section as a separate file, and re-upload each one to the relevant record. For a single file split three or four ways, that is a 15-minute process with multiple tools, multiple steps, and multiple opportunities for error.
Multiply that across the volume of large documents that accumulate in any active Salesforce Org — contracts, reports, proposals, case files, financial statements — and the time cost becomes significant.
Dumping Cloud — Salesforce File Manager eliminates this entirely with a built-in Split feature. Define your page ranges, name your output files, choose where to save them, and optionally delete the original — all in one operation, entirely inside Salesforce.
What the Split PDF Feature Does
The Split feature in Dumping Cloud — Salesforce File Manager allows you to:
- Split PDF or Word document stored on a Salesforce record into multiple separate files in one operation
- Define exact page ranges for each split using familiar print-style notation — specify precisely which pages form each output file
- Name each output file individually — use the auto-generated default name or enter a custom name for each split before saving
- Choose where each split file is saved — back to the same Salesforce record, downloaded to your desktop, or both
- Optionally delete the original file after the split is complete — keeping your record clean and your Salesforce storage lean
- Perform the entire operation within the extension panel — no PDF editor, no Word processor, no third-party splitting tool required
Who Benefits Most
The Split feature addresses one of the most common document management challenges across every team that uses Salesforce:
- Legal and contracts teams — Splitting a master contract into its component sections — agreement body, schedules, exhibits, payment terms, signature pages — so each section can be stored, shared, or routed to the right team independently
- Sales teams — Extracting a specific section from a large proposal or RFP response — for example, the pricing pages only — to share with a prospect without exposing the full document
- Customer support teams — Splitting a multi-issue diagnostic report into individual issue summaries, each saved against the relevant Case record for cleaner tracking and resolution management
- Finance and procurement — Breaking a consolidated financial statement or multi-period report into individual period documents for separate review, approval, or archiving
- HR and people operations — Extracting individual policy sections from a comprehensive HR handbook stored on a record, to distribute specific sections to relevant teams or employees
- Salesforce Admins — Splitting oversized documents that are consuming disproportionate storage into smaller, more manageable files as part of an Org storage optimisation initiative
Supported File Types for the Salesforce PDF Splitter
The Split feature supports the two most common document formats in Salesforce:
- PDF (.pdf) — Split any PDF into multiple PDF output files, each containing the pages you define
- Word Documents (.docx) — Split any Word document into multiple Word document output files, each containing the pages you define
Page Range Definition — Print-Style Precision
The Split feature uses the same page range notation you are already familiar with from everyday printing — so there is zero learning curve.
When defining how a file should be split, you specify the page ranges for each output file using simple, flexible syntax:
- A single page — e.g., 5 (creates a file containing only page 5)
- A continuous range — e.g., 1-10 (creates a file containing pages 1 through 10)
- Multiple individual pages — e.g., 2, 5, 9 (creates a file containing pages 2, 5, and 9)
- A combination — e.g., 1-5, 8, 11-15 (creates a file containing pages 1 to 5, page 8, and pages 11 to 15)
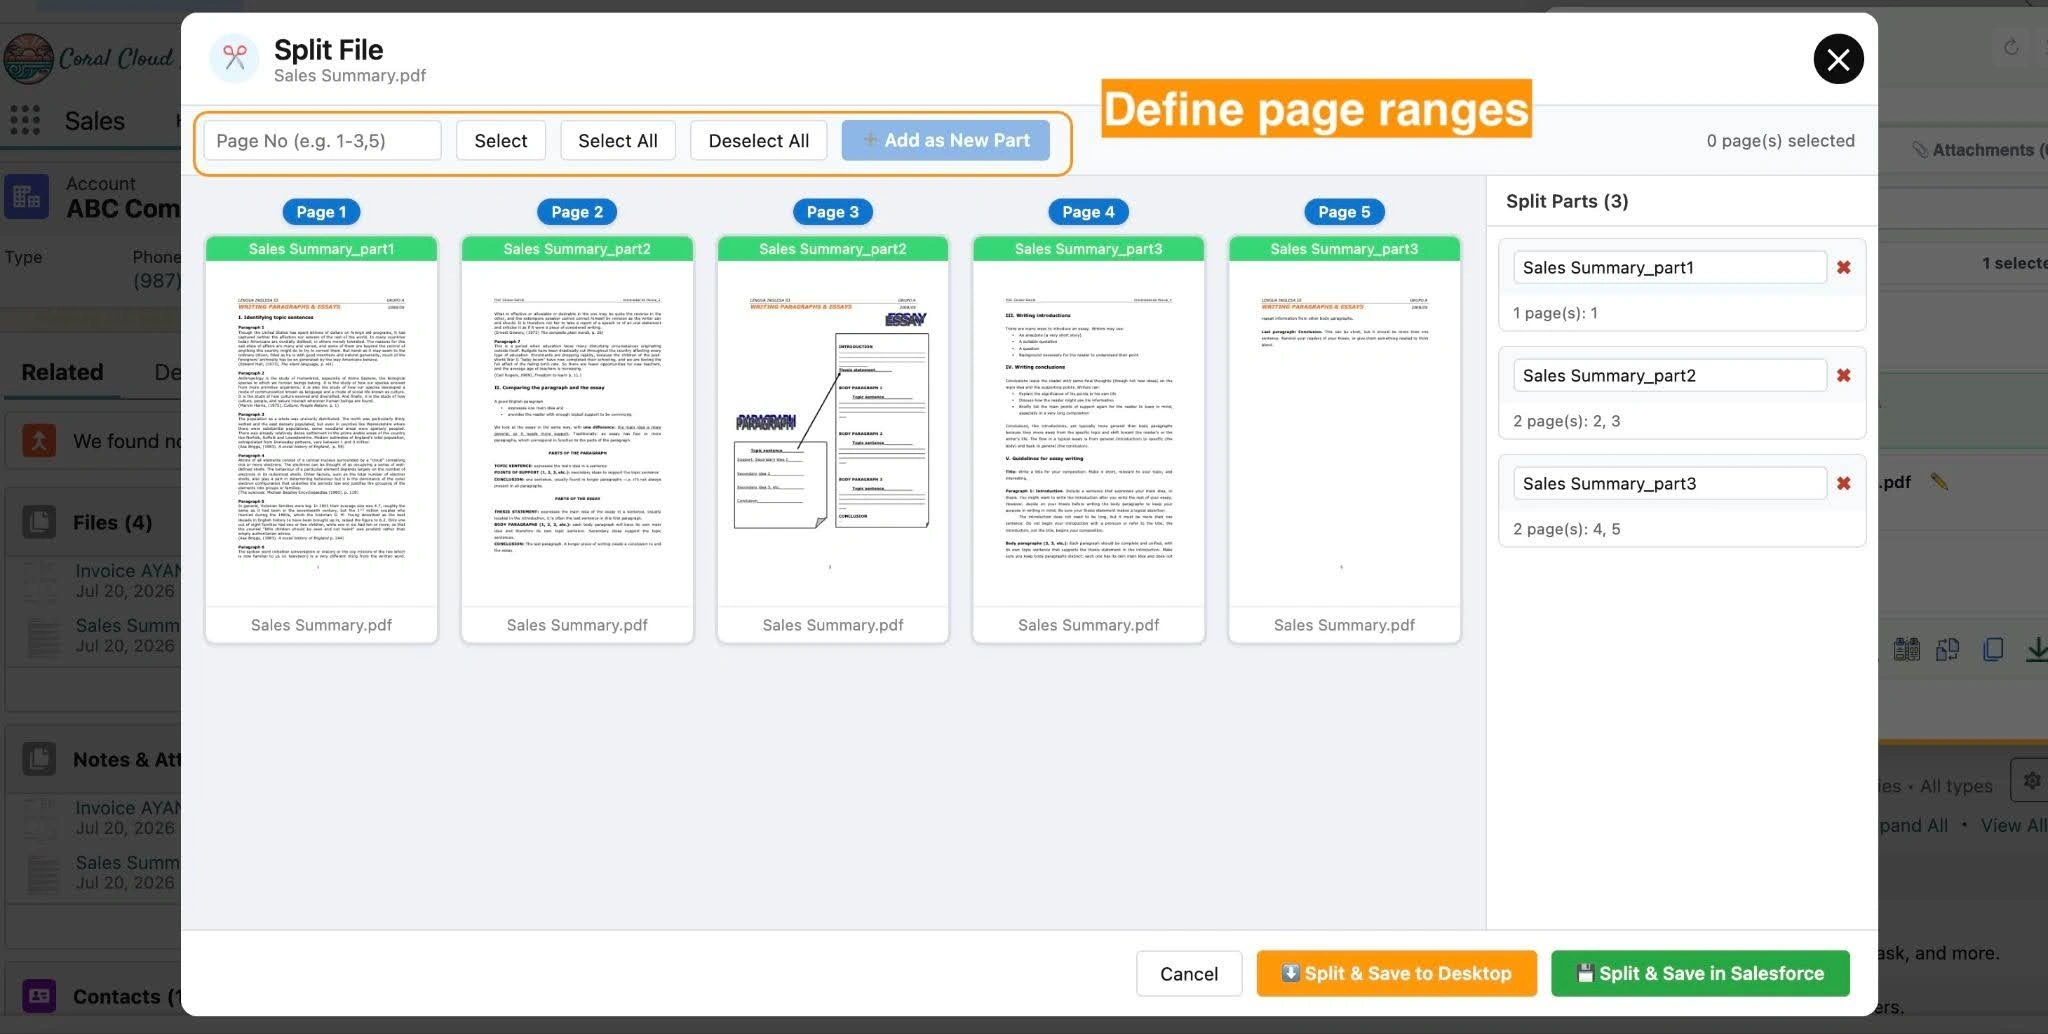
Each page range you define becomes a separate output file. You can define as many ranges as needed in a single split operation — one file becomes three, five, or ten separate documents in one go.
File Naming — Default or Custom Per Split
Before saving, Dumping Cloud — Salesforce File Manager gives you control over how each output file is named:
Default Name: The extension automatically generates a name for each split file based on the original file name and the page range — for example, “Contract_Pages_1-5.pdf”. Use this when you want to proceed quickly without manually naming each output.
Custom Name: Enter your own descriptive name for each output file individually — for example, “Agreement_Body.pdf”, “Payment_Terms.pdf”, “Signature_Pages.pdf”. Custom names make each split file immediately identifiable when saved on the record or shared externally.
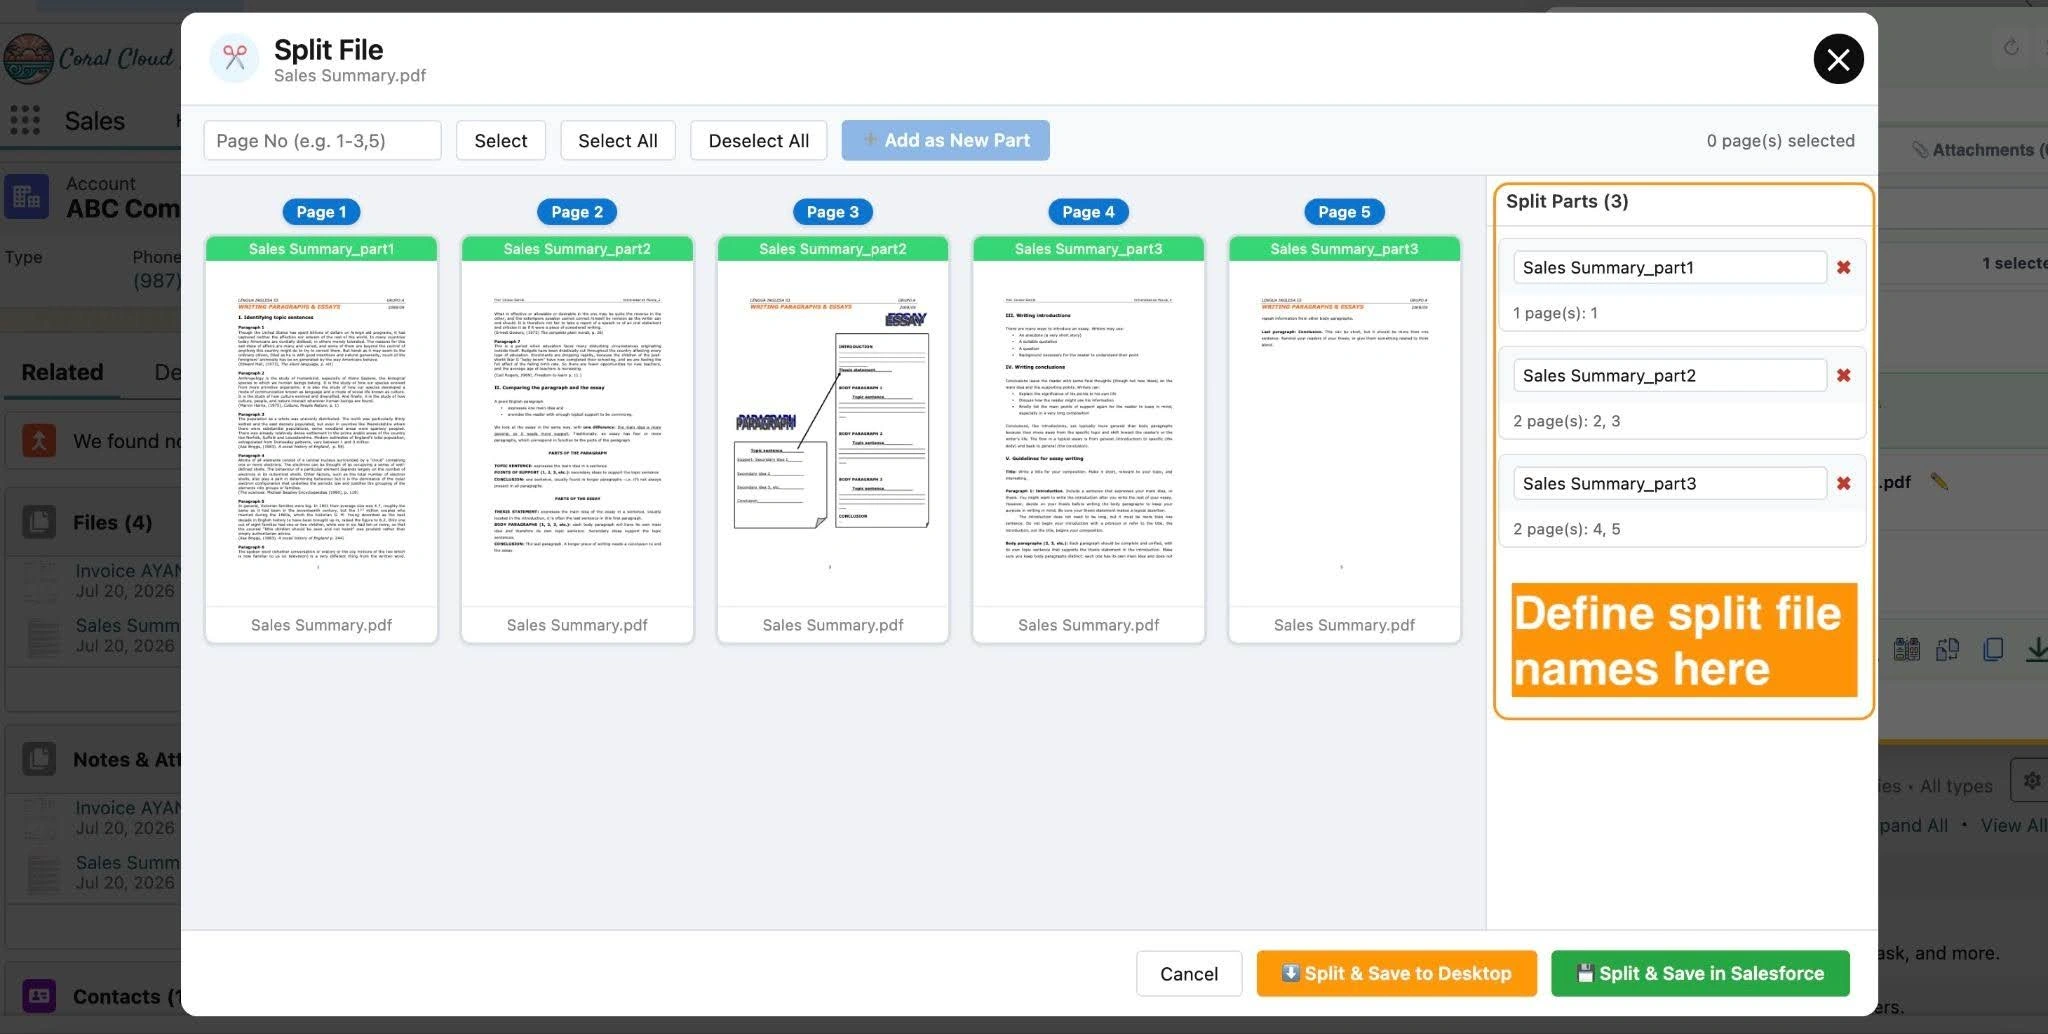
Each output file in the split operation is named independently — so you can mix default and custom names across different splits in the same operation.
Step-by-Step: How to Split Files Using Dumping Cloud — Salesforce File Manager
Prerequisites
Before you begin, ensure the following:
- Google Chrome is installed on your desktop
- Dumping Cloud is installed from the Chrome Web Store (Install here)
- You are logged into your Salesforce Org in the same Chrome browser
- The file you want to split is a PDF or Word document attached to a Salesforce record
- You have the necessary Salesforce permissions to view and manage files on the target record
01
Step 1
Navigate to the Record and Open the Extension
Open Google Chrome and log in to your Salesforce Org. Navigate to the record containing the file you want to split — for example, a Contract with a large multi-section agreement, or a Case with a lengthy diagnostic report.
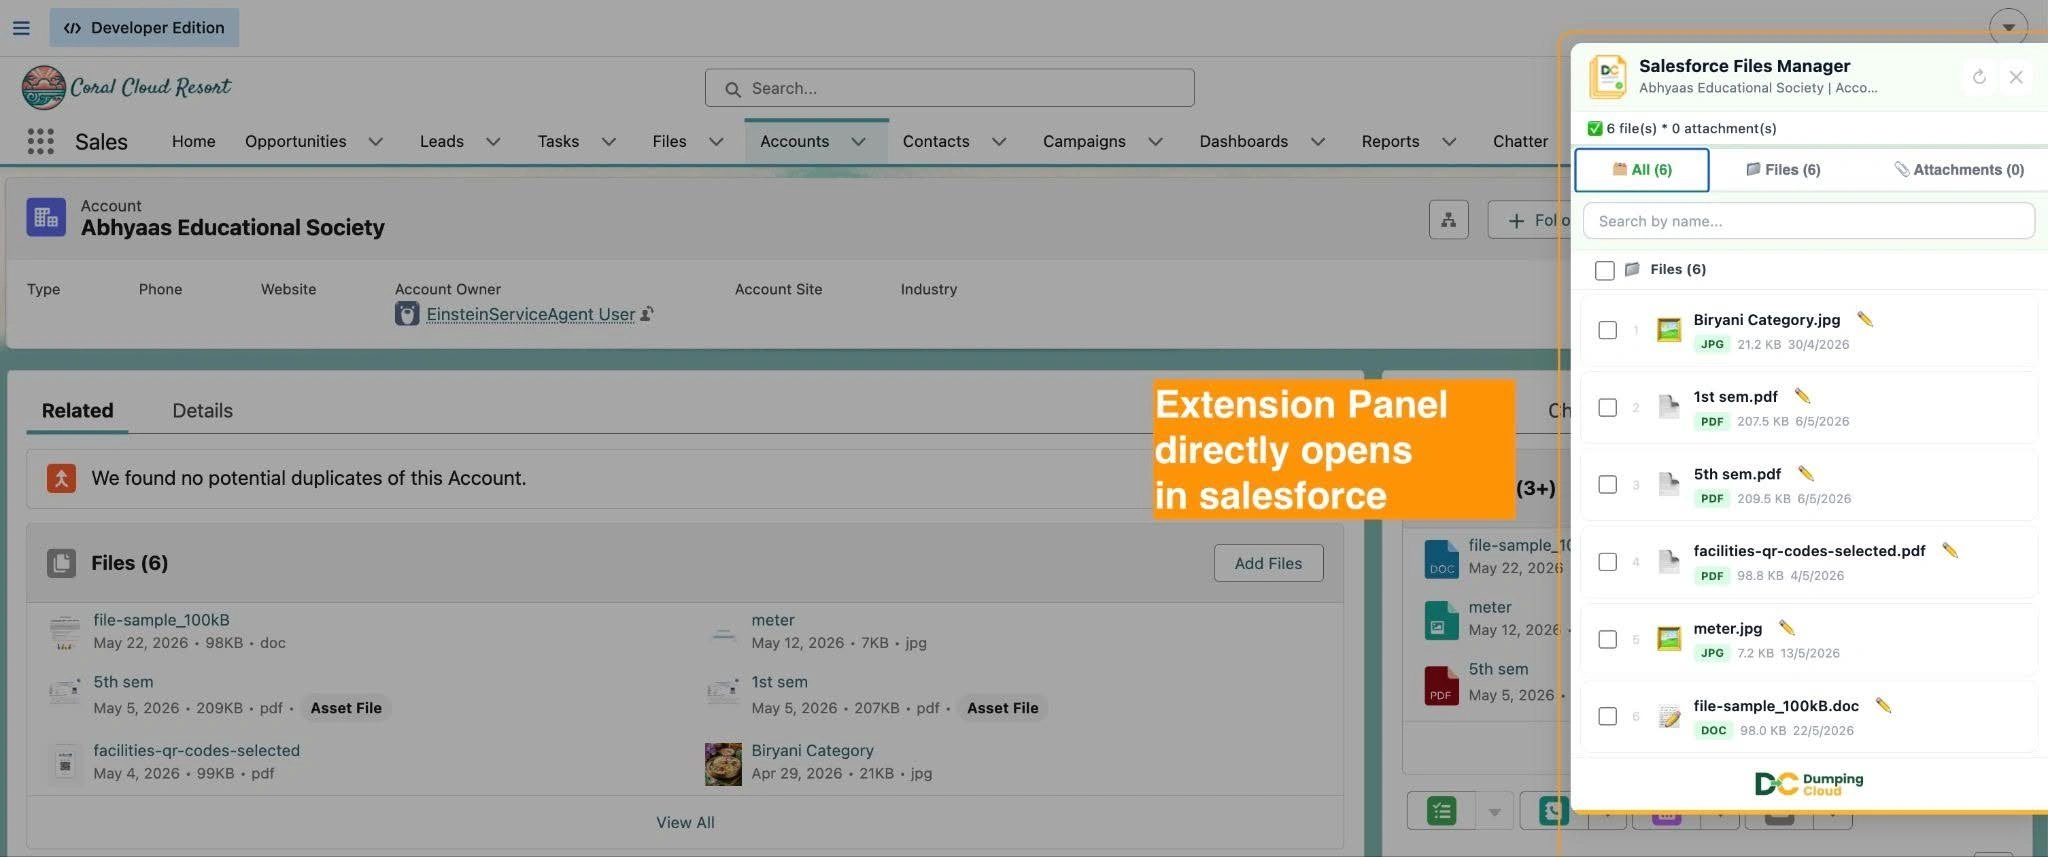
Click the Dumping Cloud — Salesforce File Manager icon in your Chrome toolbar to open the extension panel. The panel will load all files associated with the current record.
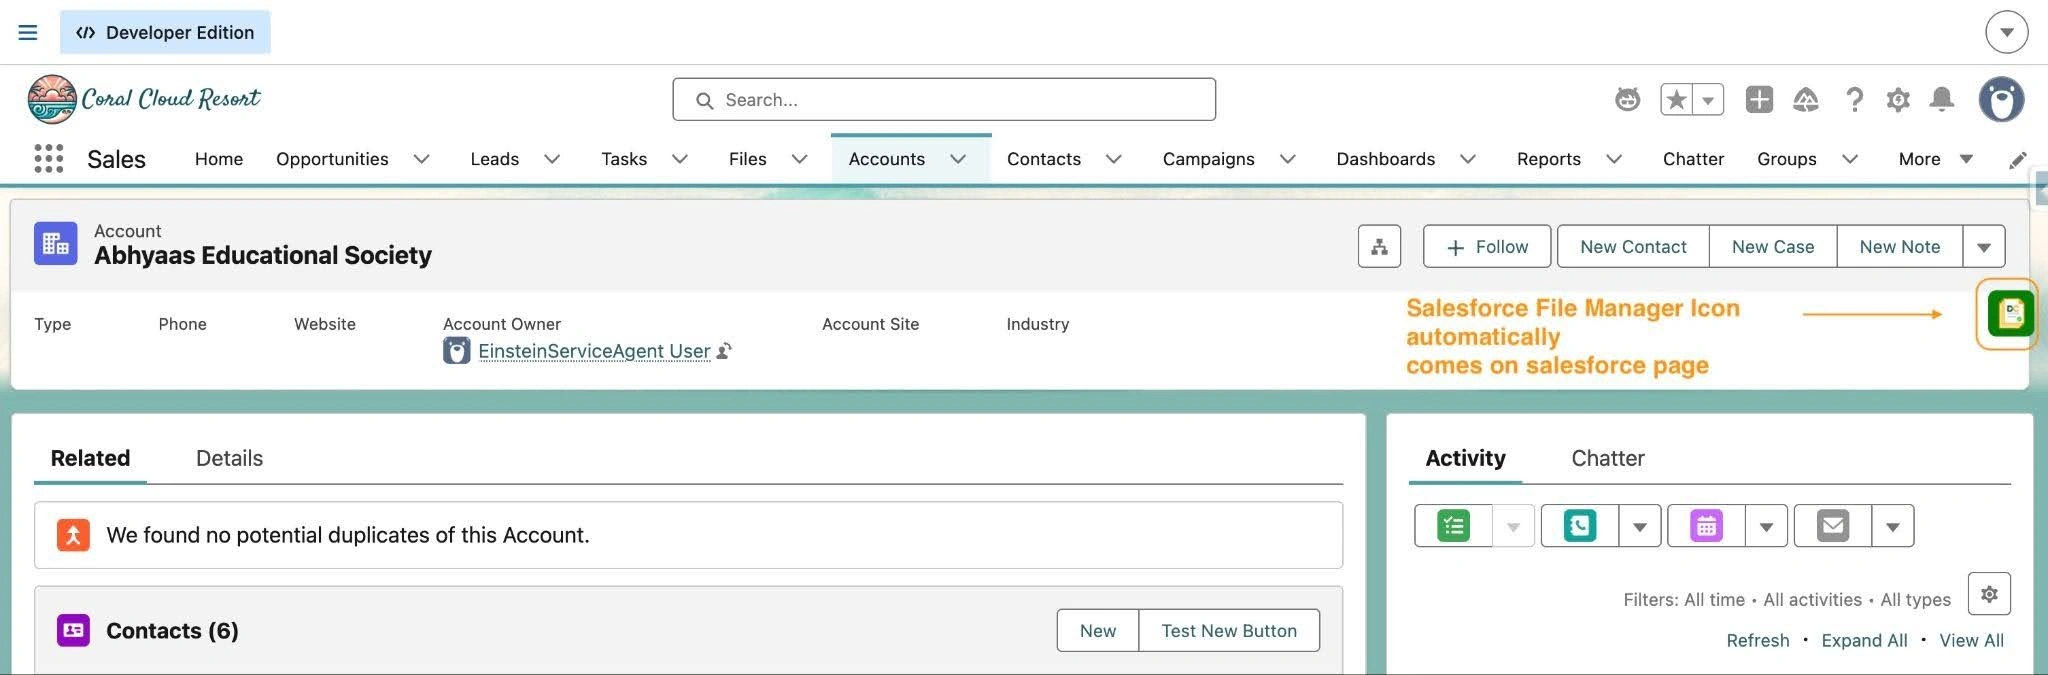
The extension panel will open and automatically load all files and attachments associated with the current record.
02
Step 2
Select the File to Split
Click the checkbox next to the PDF or Word document you want to split. The Split feature operates on one file at a time — select a single file to proceed.
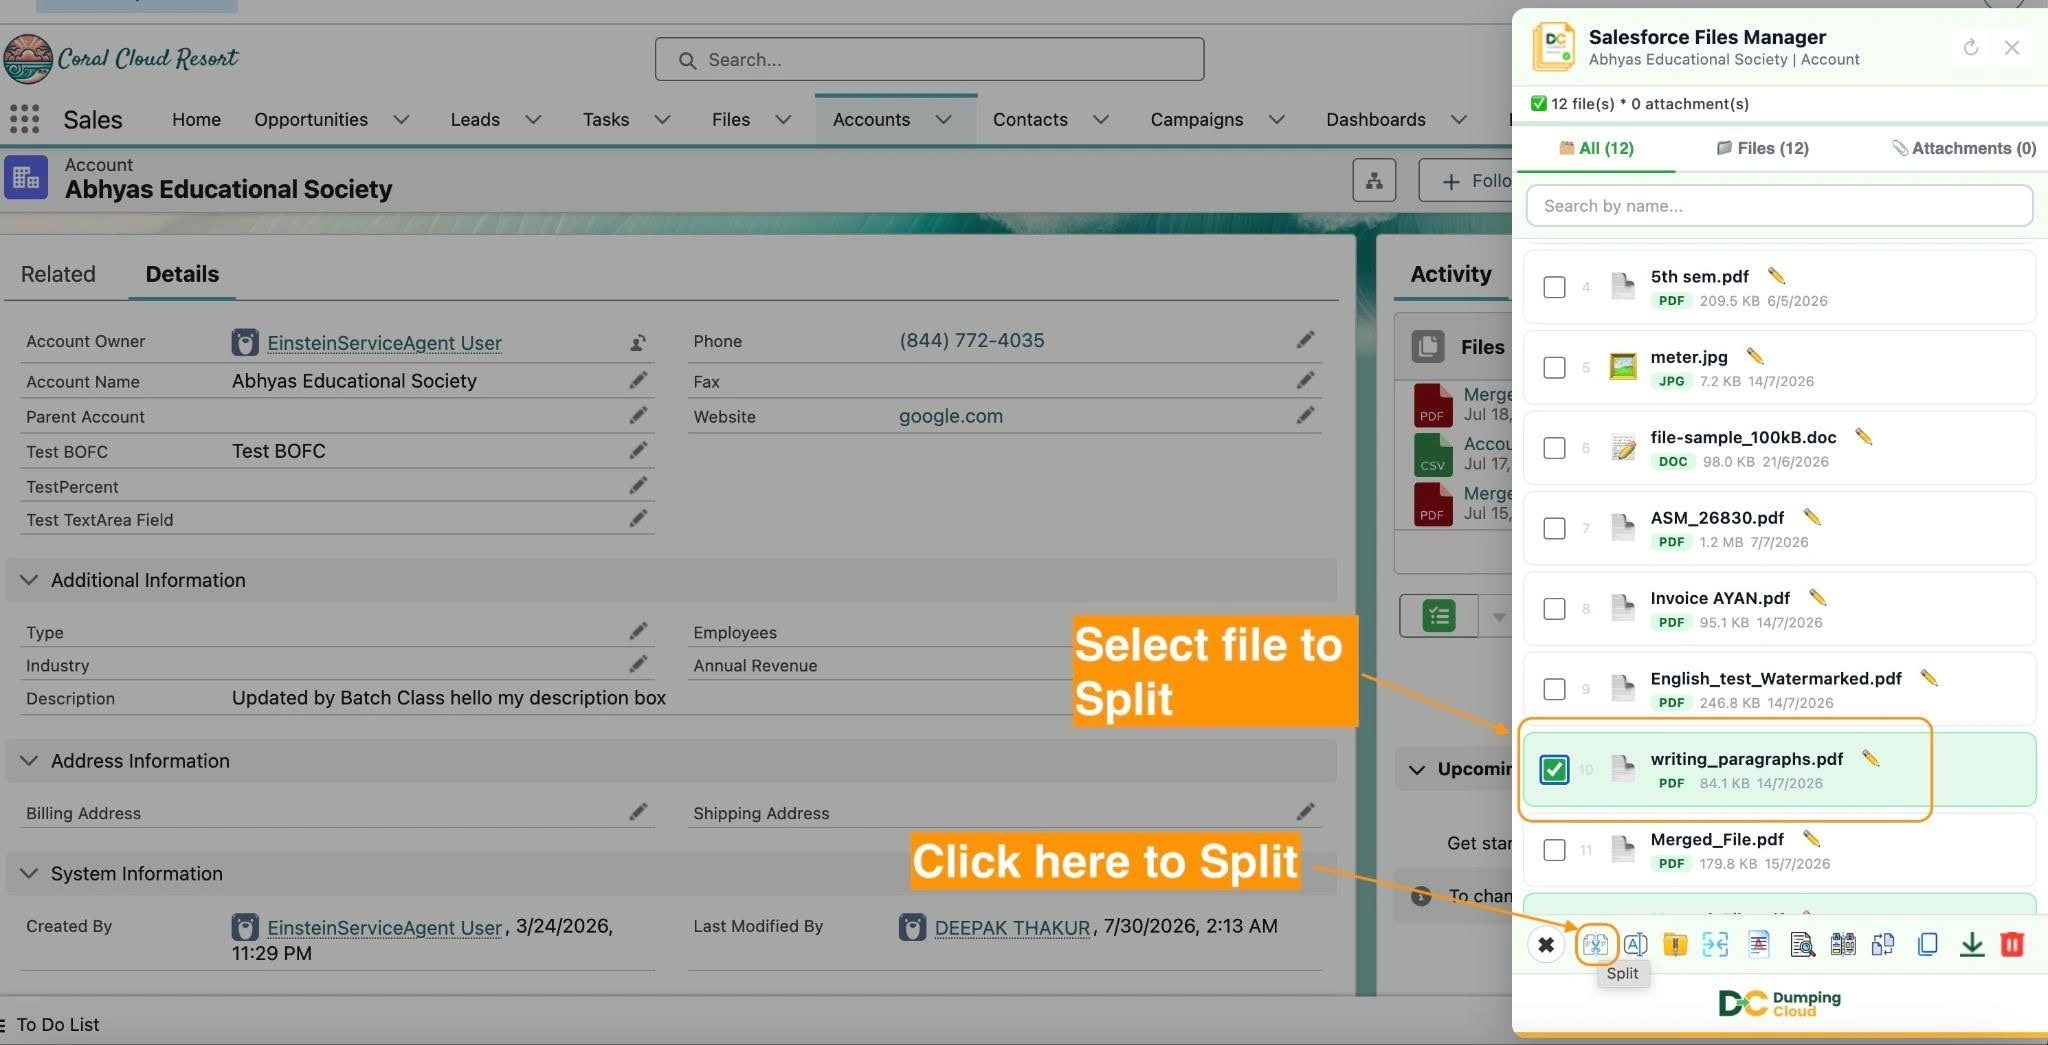
Click the “Split” Button
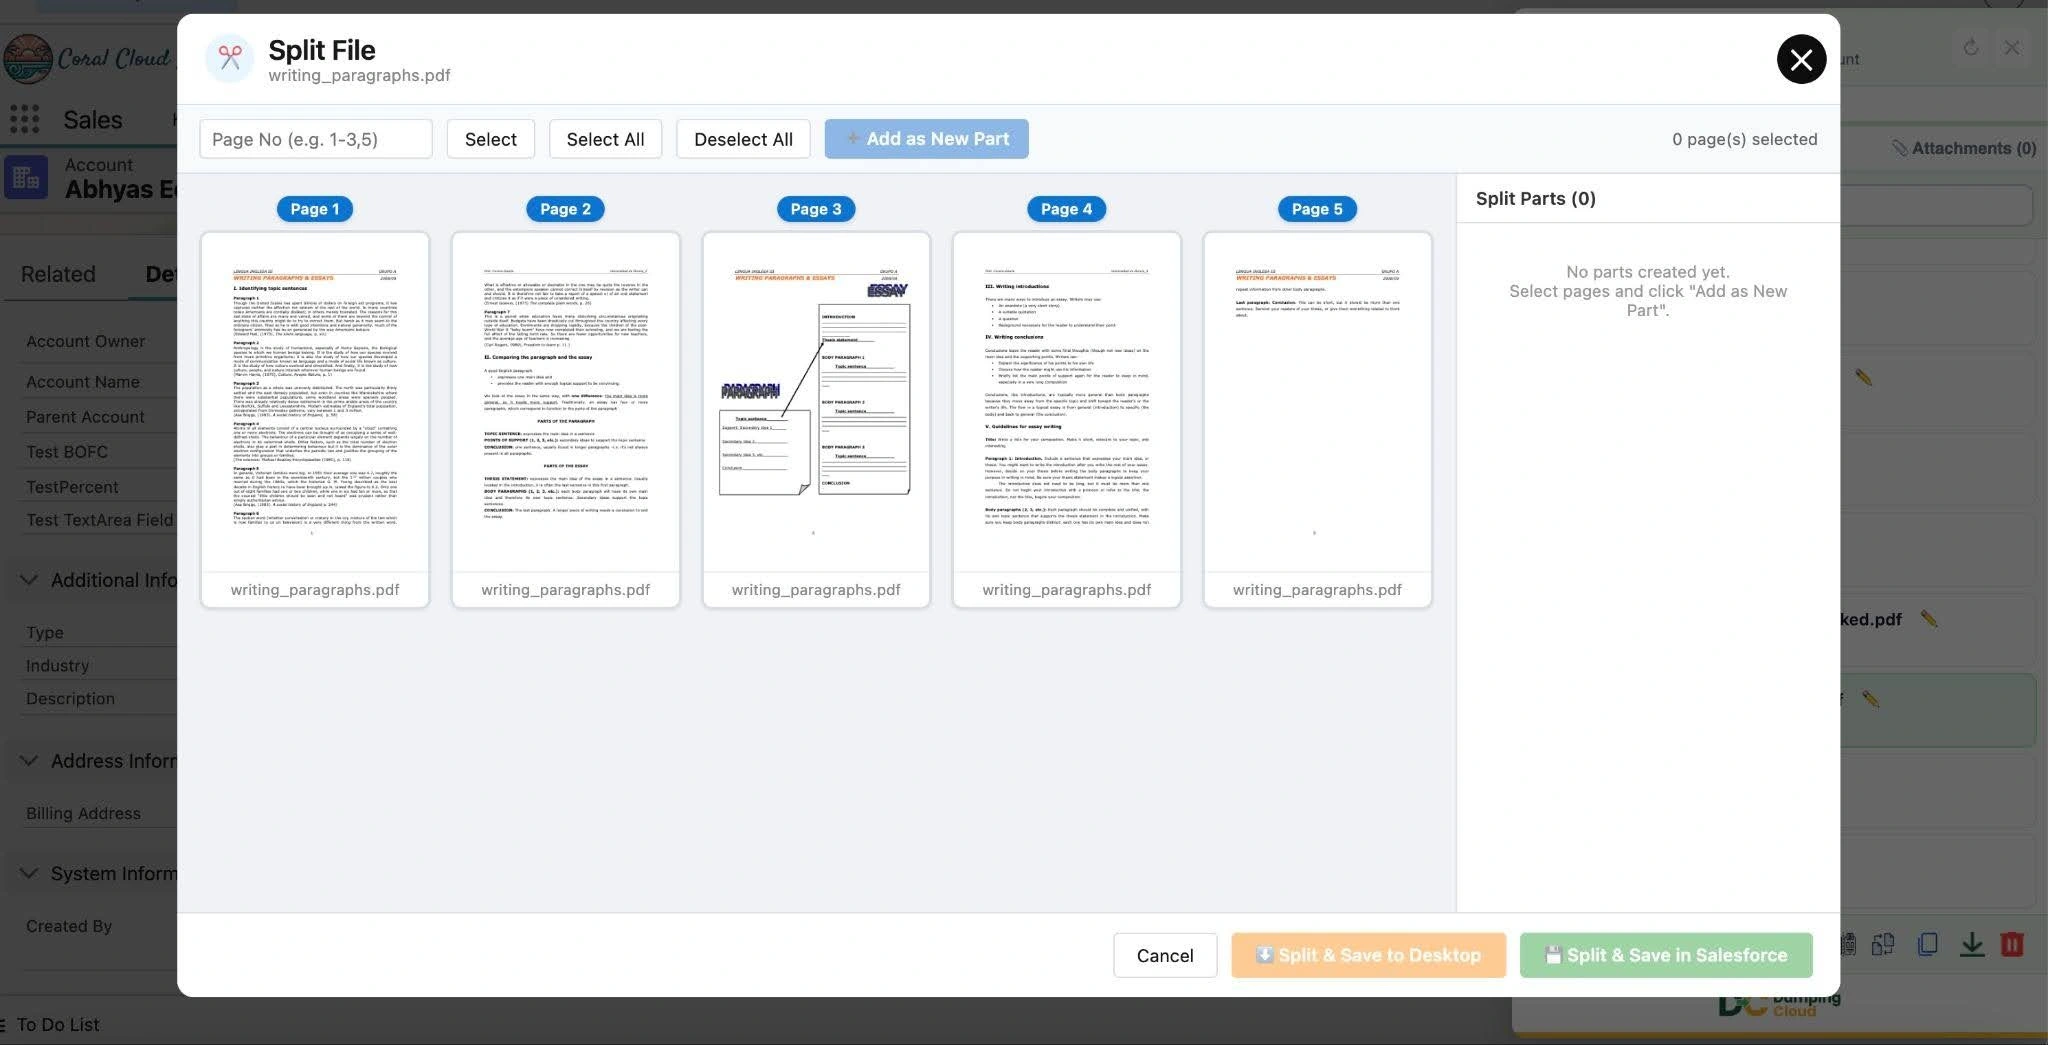
With your file selected, click the “Split” button in the extension panel action bar. The Split configuration panel will open, displaying the total page count of the selected file.
03
Step 3
Define Your Page Ranges or select manually
In the Split configuration panel, define the page ranges for each output file. Click “Add as New Part” to add a new part for each split file you want to create.
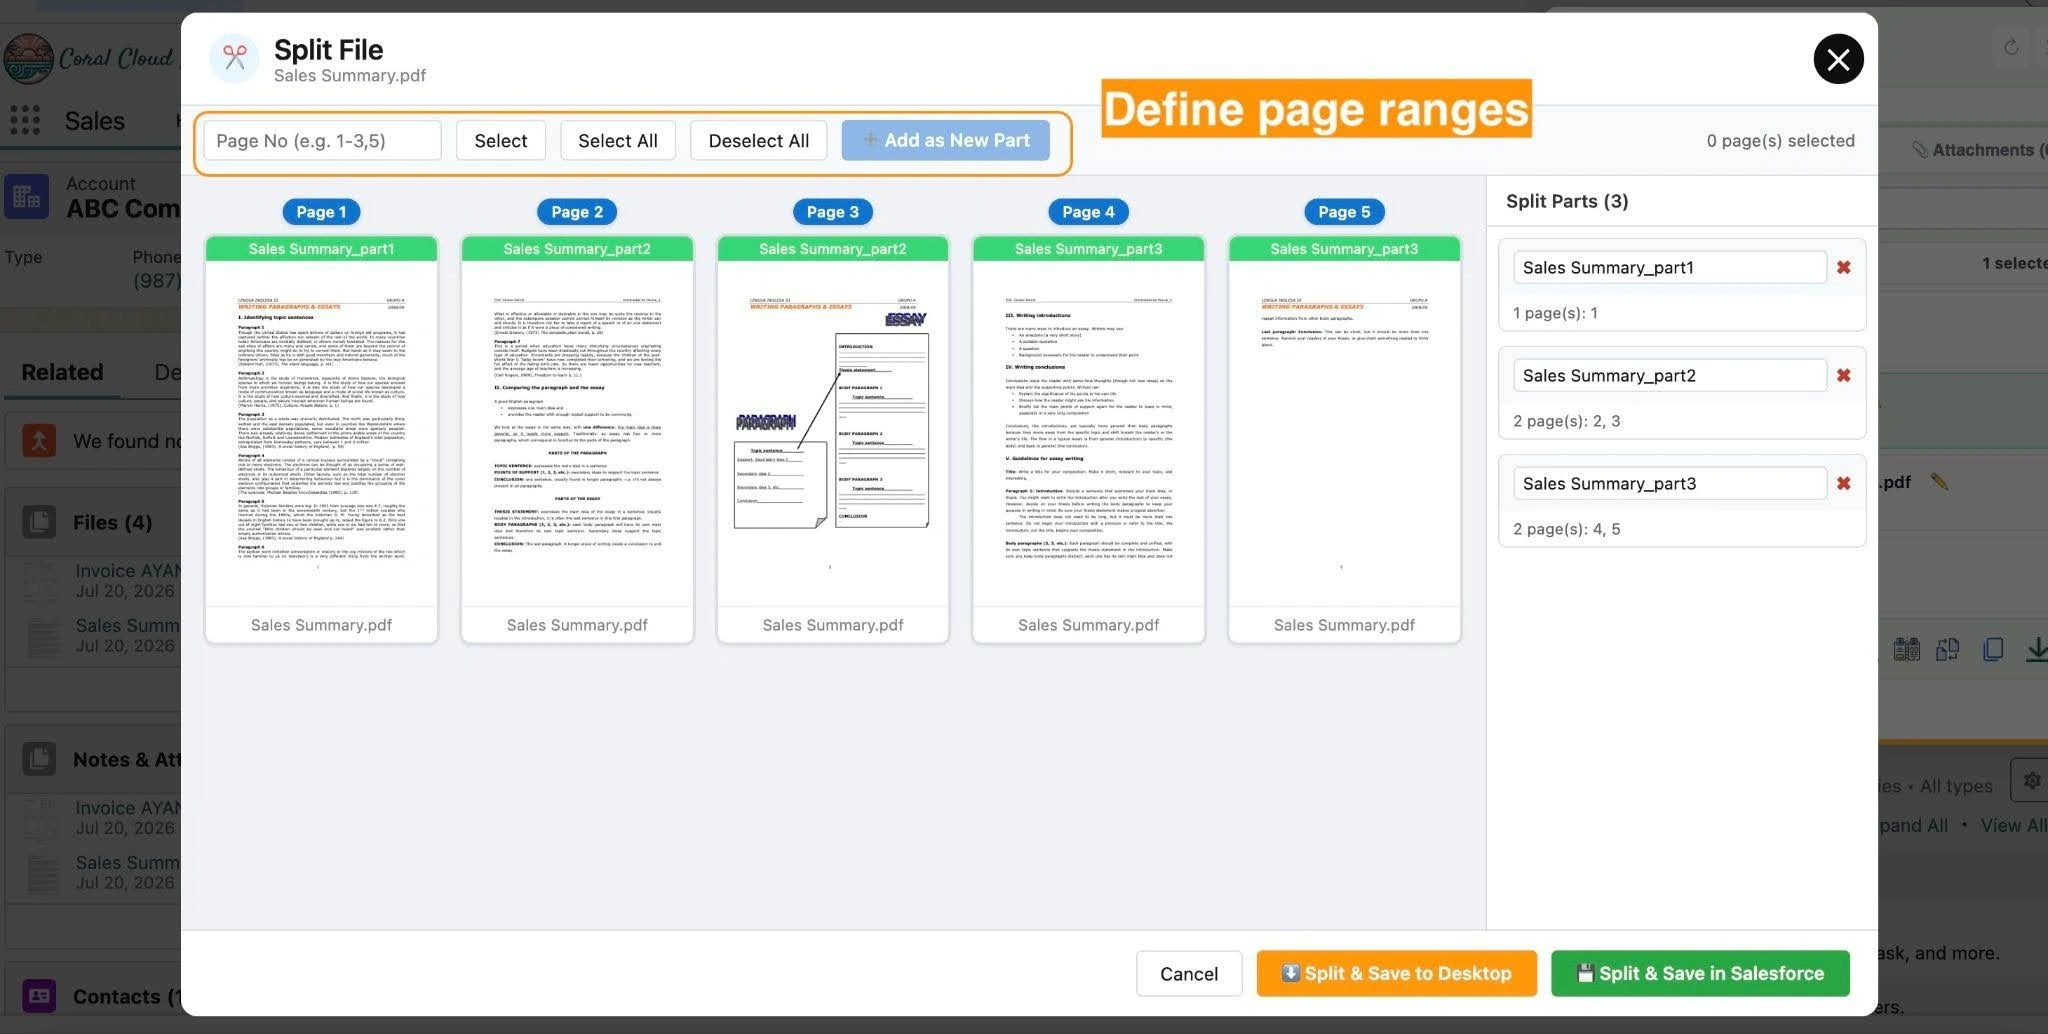
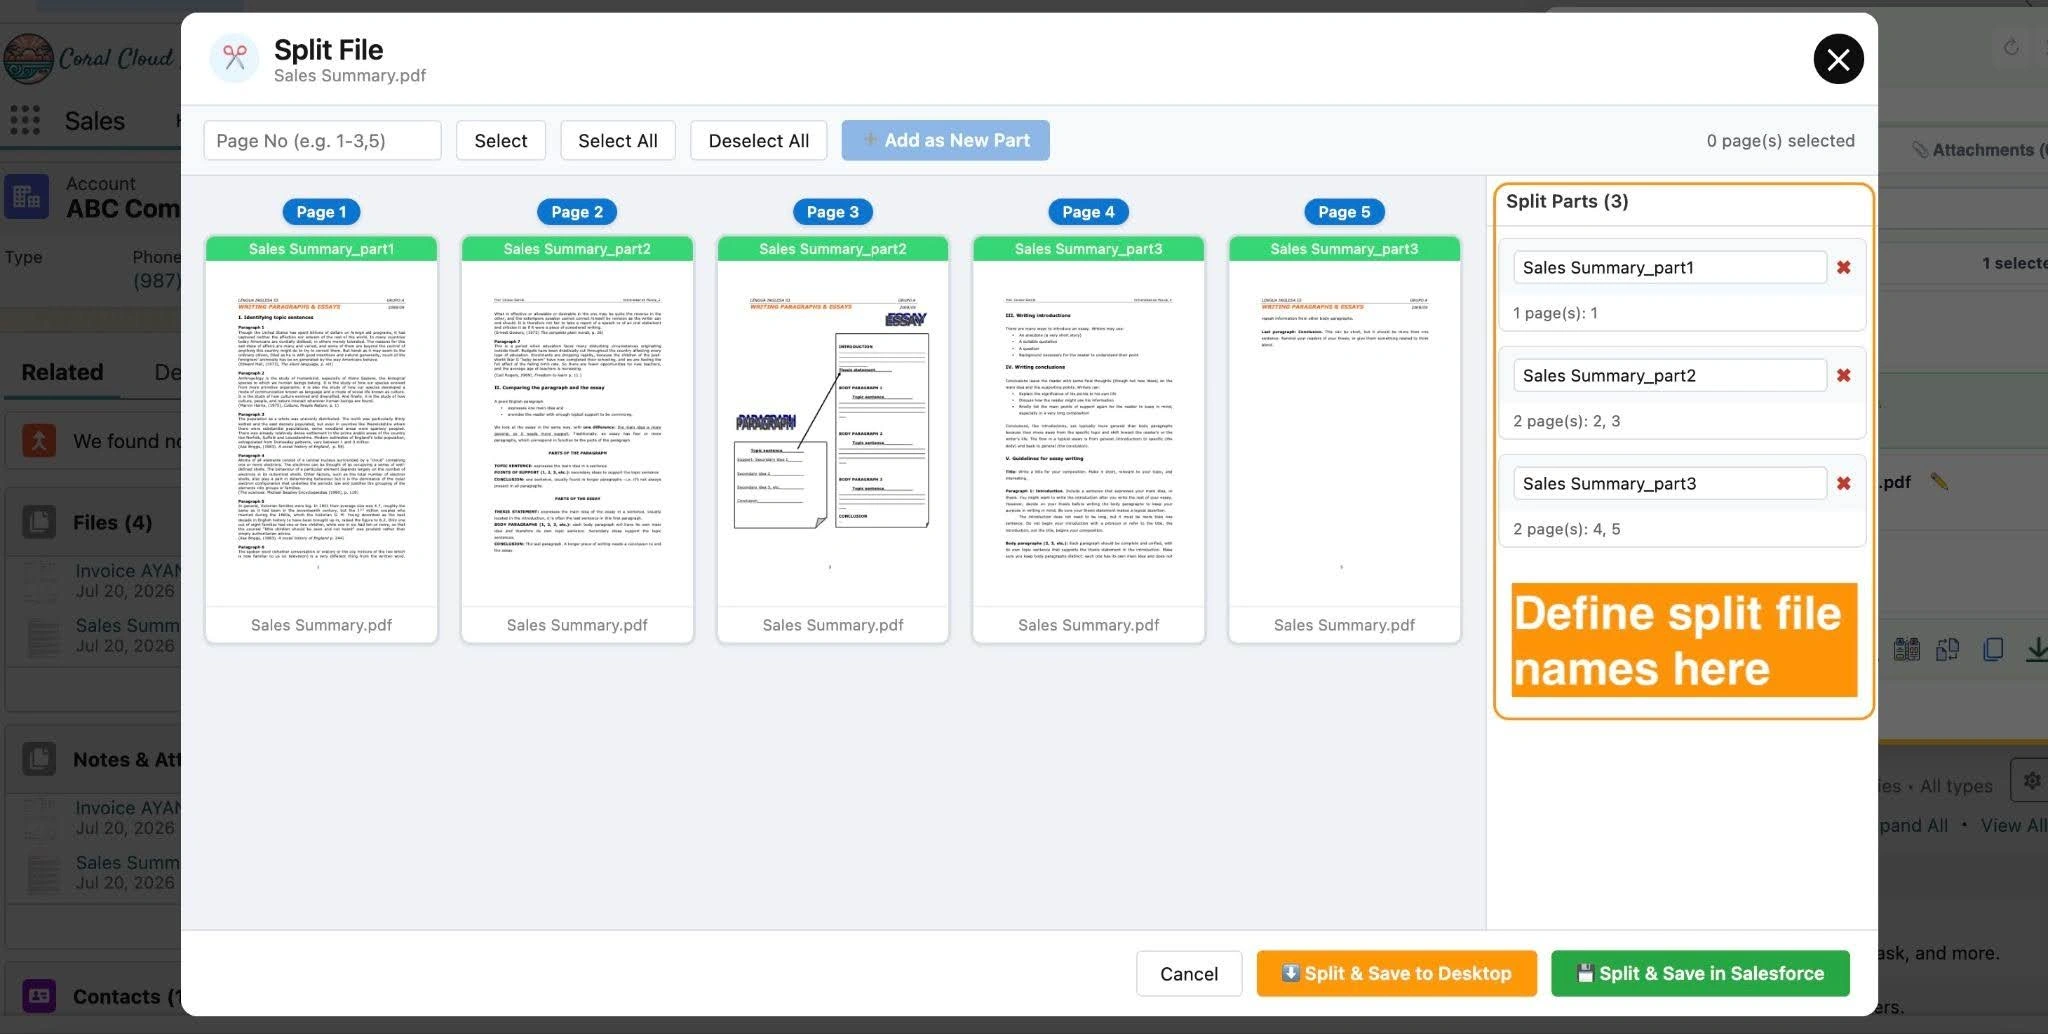
For each part, enter:
- Page range — using print-style notation (e.g., 1-10, 11-20, 21-40)
- File name — use the auto-generated default or type a custom name
Add as many parts as needed until every required split is defined. The total page count displayed at the top of the panel helps you ensure all pages are accounted for.
04
Step 4
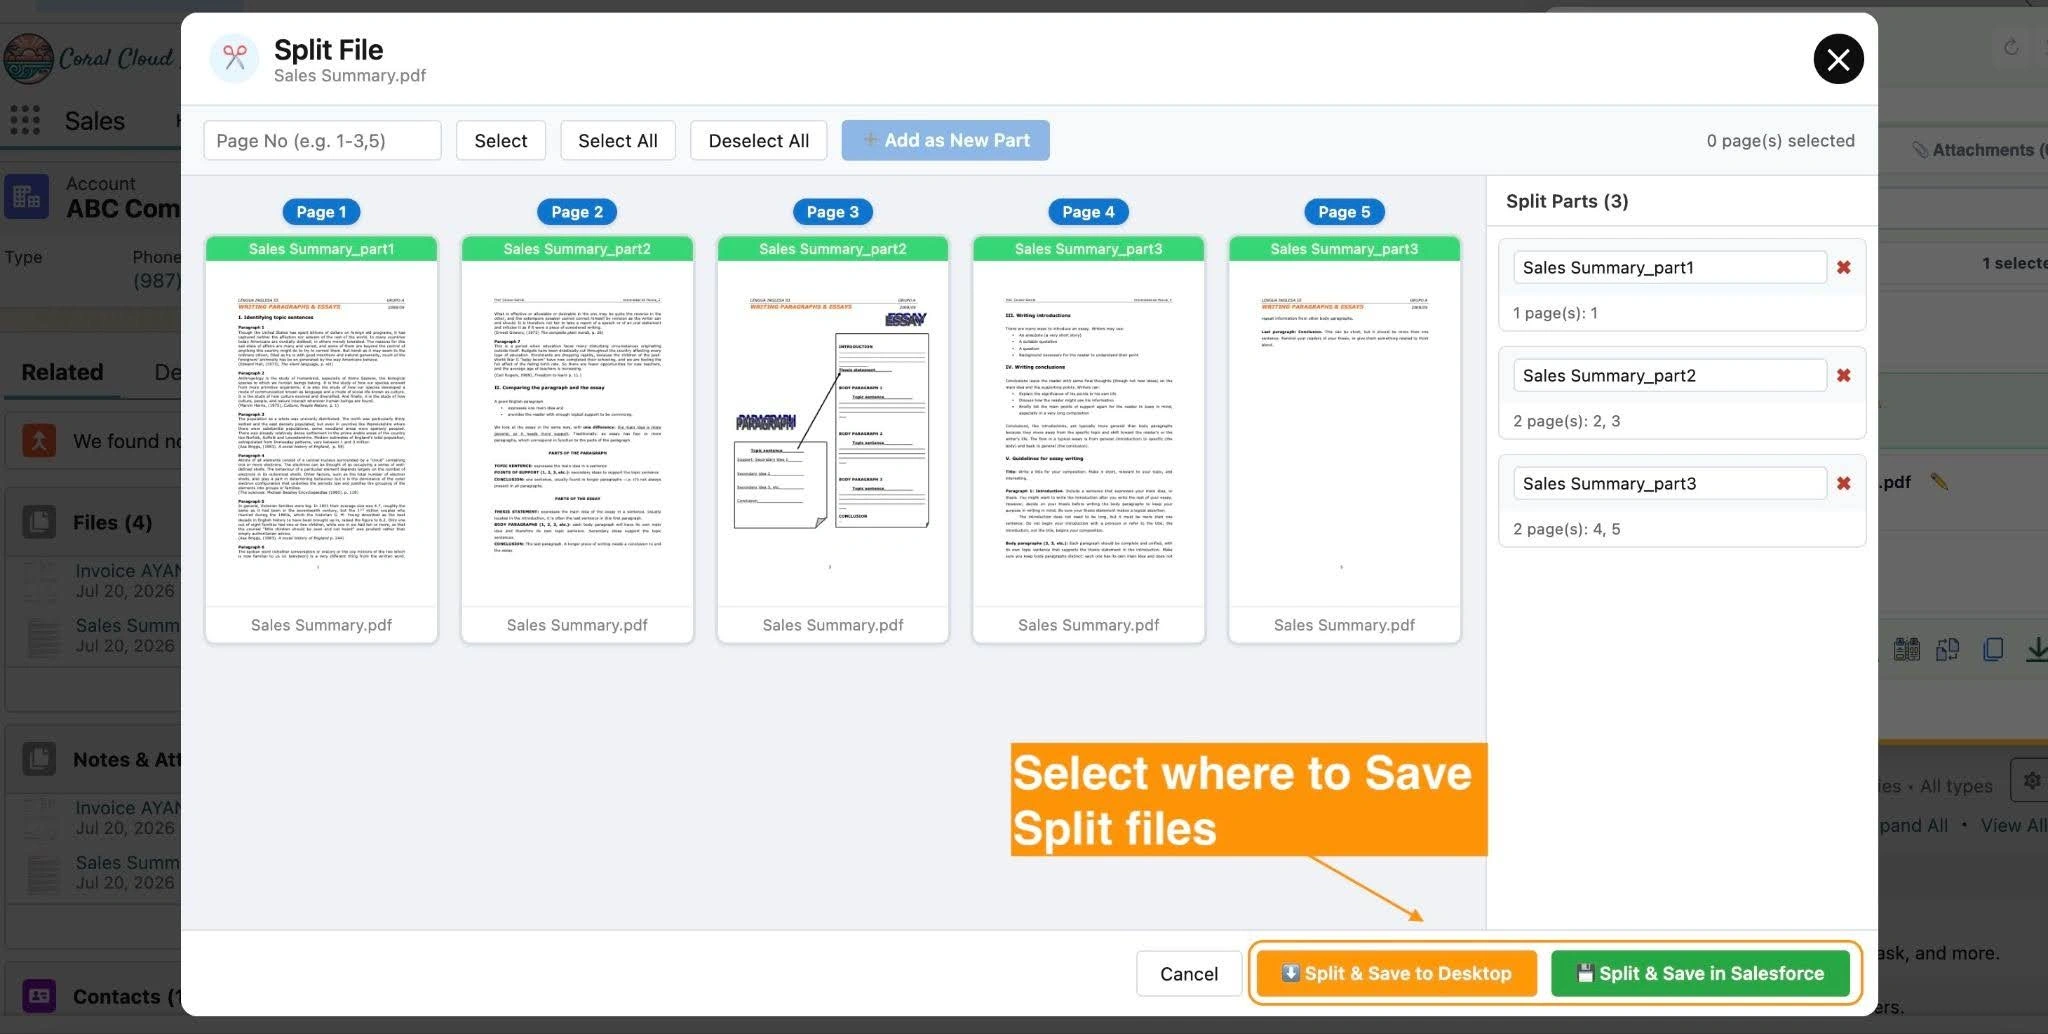
Choose Your Save Destination
Select where each split file should be saved:
- Save to Salesforce Record — files saved back to the same record
- Save to Desktop — files downloaded to your local machine
- Save to Both — files saved to the record and downloaded simultaneously
05
Step 5
Choose Whether to Delete the Original File
Below the save options, you will see an optional checkbox: “Delete original file after splitting”.
- Leave unchecked — the original file remains on the Salesforce record after all split files are saved
- Check this option — the original file is deleted from the record once all split files have been successfully saved, and moved to the Salesforce Recycle Bin
06
Step 6
Click “Save” button to process the action
Once your page ranges, file names, destination, and delete preference are all confirmed, click the “Save” button to execute the operation.
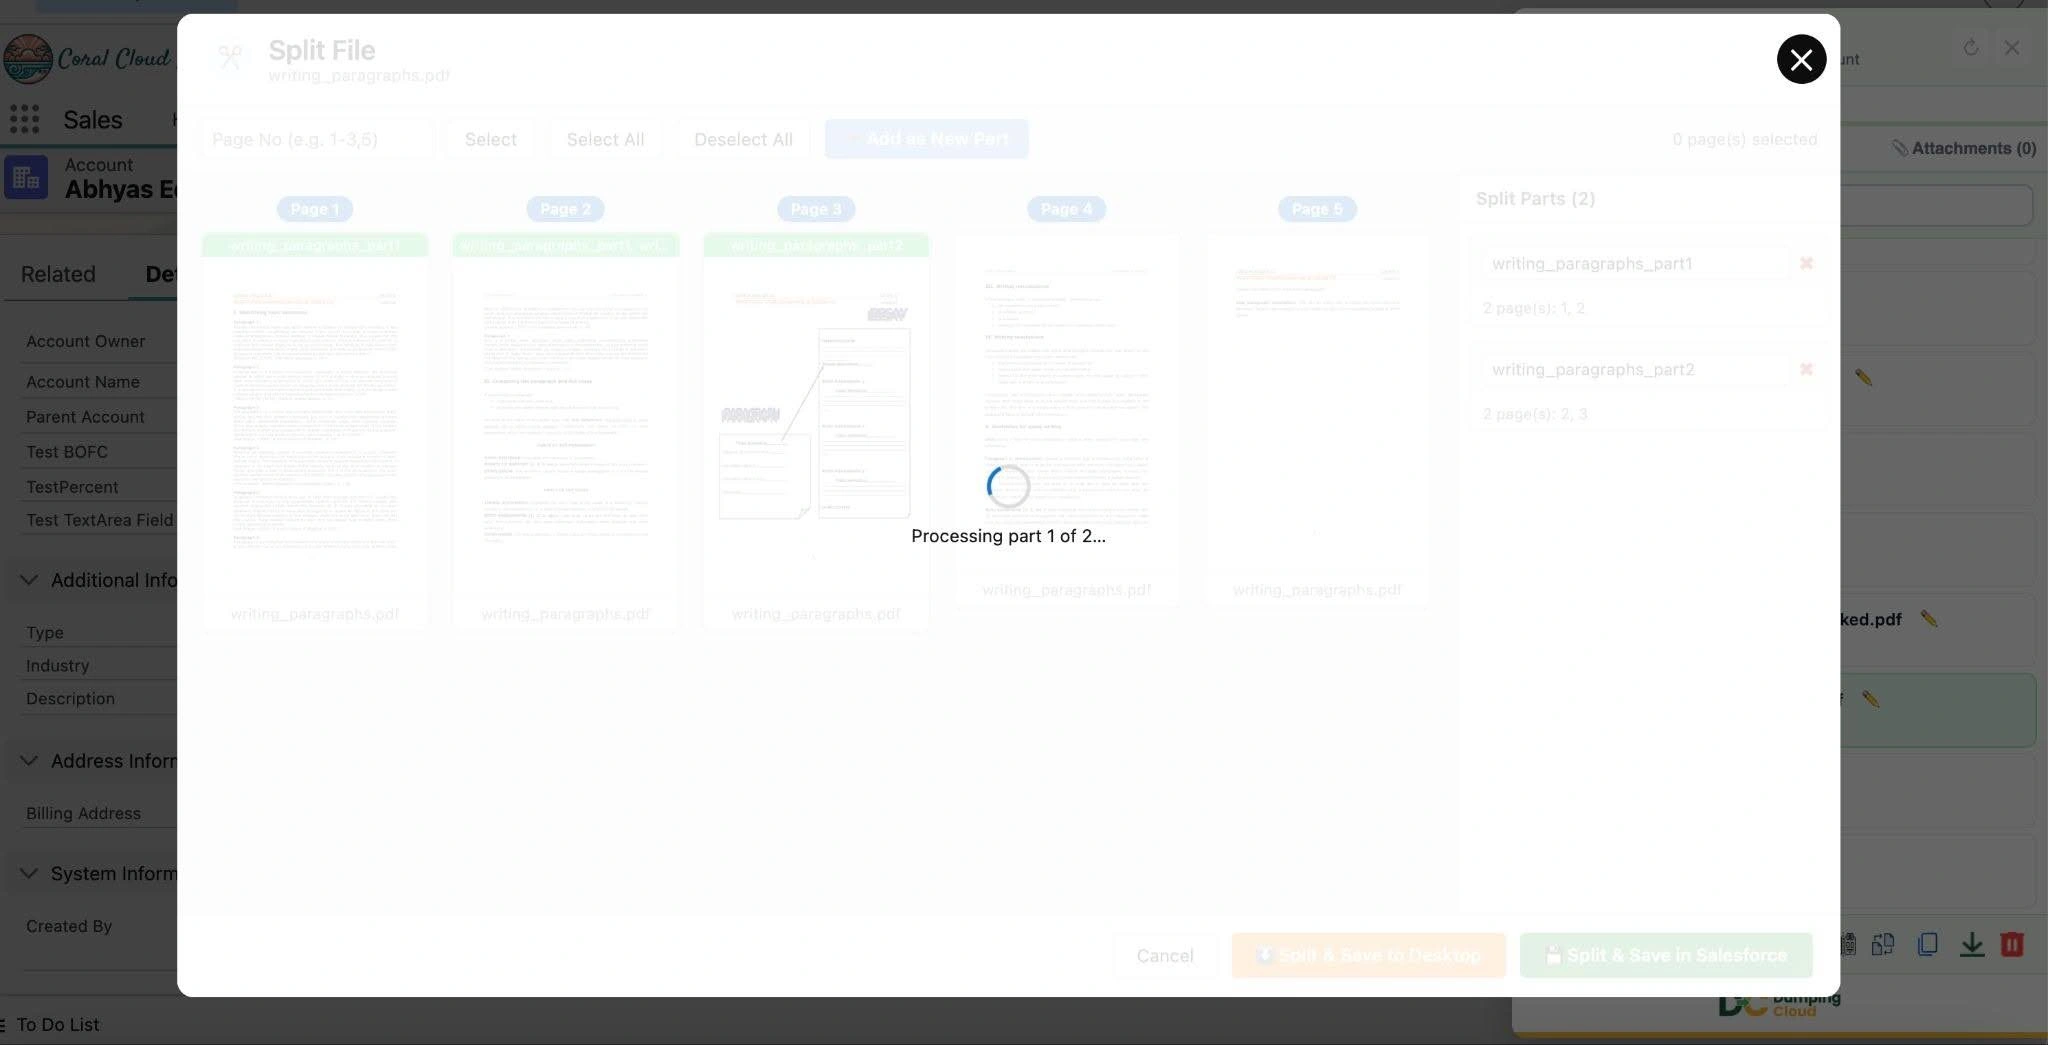
Once your page ranges, file names, destination, and delete preference are all confirmed, click the “Save” button to execute the operation.
07
Step 7
Verify the Split Files
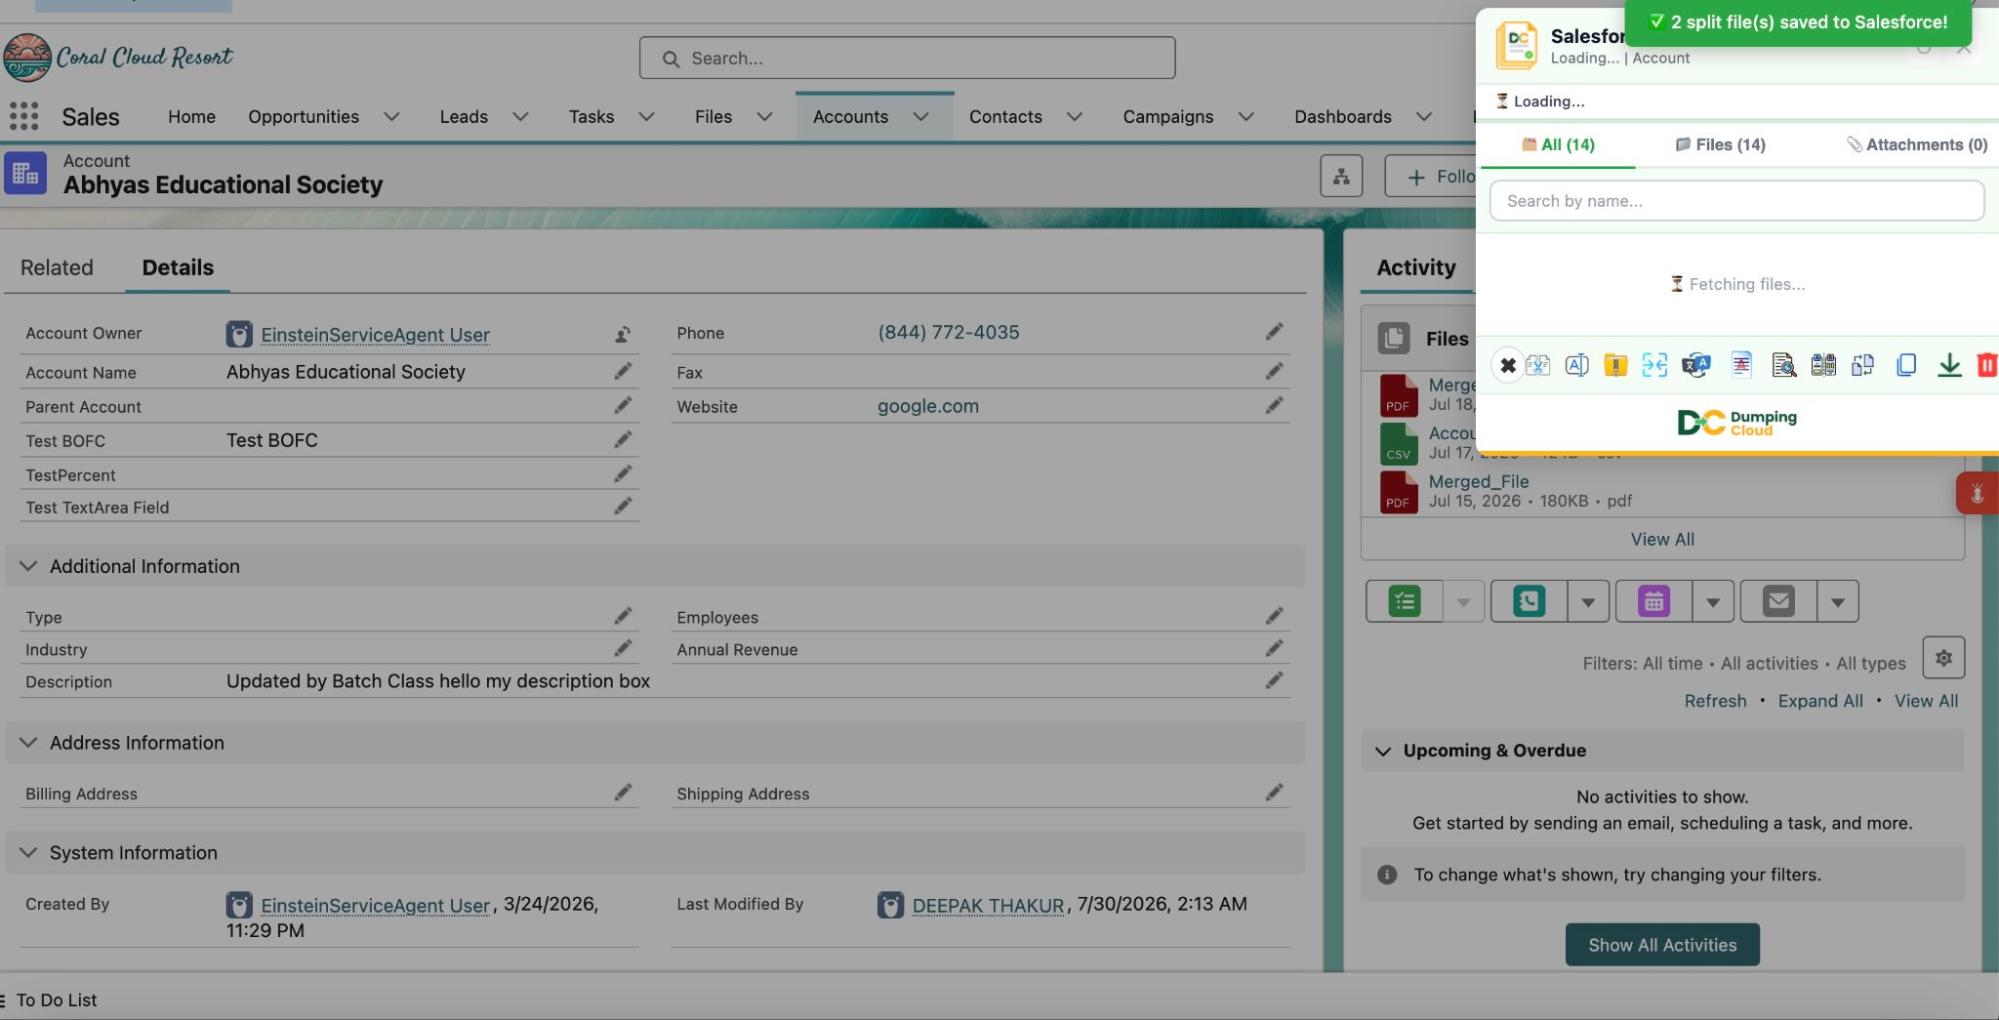
A success confirmation will display once the split is complete, listing all output file names and their save destinations. Navigate to the Files related list on the Salesforce record to confirm all split files are present and correctly named. If you saved to the desktop, locate the files in your browser’s default download folder.
Key Advantages Over the Manual Approach
| Capability | Manual Download & Split | Dumping Cloud |
|---|---|---|
| Split a PDF into multiple files | ✅ Via third-party PDF editor | ✅ Directly in the extension |
| Split a Word document into multiple files | ✅ Via Word / manual copy-paste | ✅ Directly in the extension |
| Define page ranges with print-style notation | Depends on tool | ✅ Built into split panel |
| Name each output file individually | ✅ After saving | ✅ Before saving |
| Save split files back to Salesforce automatically | ❌ Manual re-upload required | ✅ Built-in save-to-record option |
| Save to desktop and record simultaneously | ❌ Separate operations | ✅ Save to Both option |
| Delete original after splitting | ❌ Separate manual step | ✅ Optional in-operation delete |
| Stays within Salesforce workflow | ❌ Requires external application | ✅ No external tools needed |
| Time for a 4-way split | 10–20 minutes | Under 2 minutes |
Install Dumping Cloud – Salesforce File Manager
👉 Try DumpingCloud — on your favorite browser

Frequently Asked Questions
Can I split a Word document into multiple files in Salesforce, not just a PDF?
Yes. The Split feature supports both PDF (.pdf) and Word (.docx) files. The process is identical for both formats — define page ranges and each range becomes a separate output file in the original format.
What page range formats can I use to split PDF pages in Salesforce?
The splitter uses familiar print-style notation: a single page (e.g., "5"), a continuous range (e.g., "1-10"), multiple individual pages (e.g., "2, 5, 9"), or a combination (e.g., "1-5, 8, 11-15"). Each range you define becomes its own output file.
Can the split PDF files be saved back to the Salesforce record automatically?
Yes. You can choose to save split files back to the same Salesforce record, download them to your desktop, or do both in the same operation — no manual re-upload needed.
Does splitting a file in Salesforce delete or change the original document?
No, unless you choose to. By default the original file remains on the record untouched. You can optionally check "Delete original file after splitting," which moves the original to the Salesforce Recycle Bin (recoverable for 15 days) once all split files have saved successfully.
Ready to manage Salesforce Files faster?
Download, move, rename, merge, split, convert, compare, and manage your Salesforce Files — without leaving Salesforce.